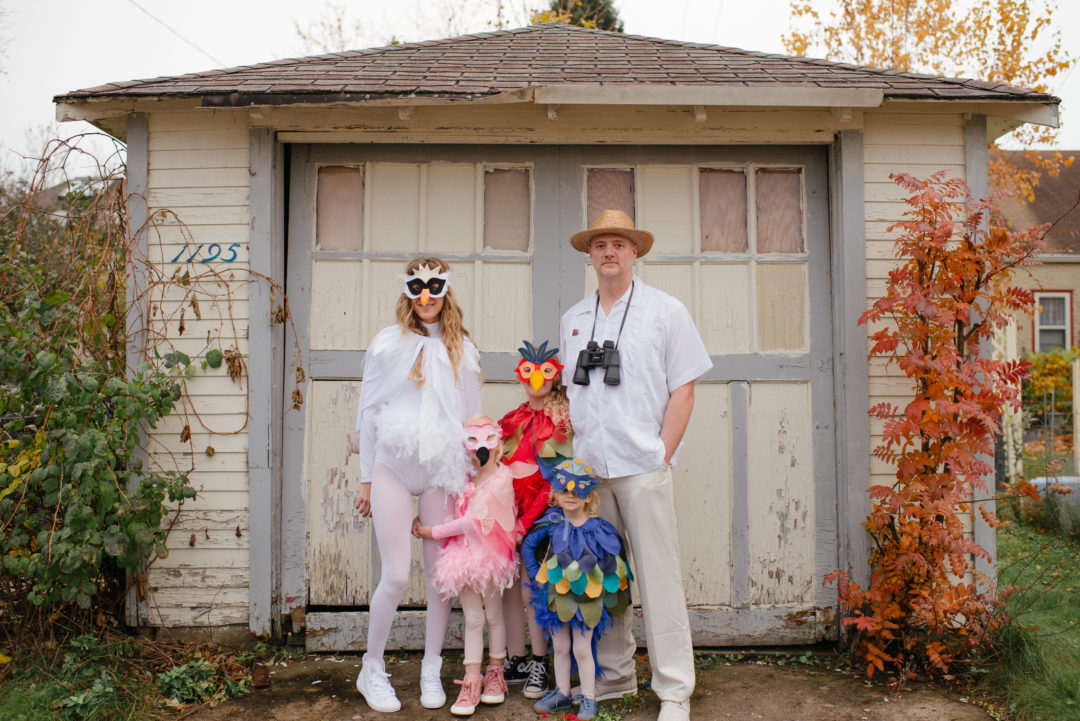
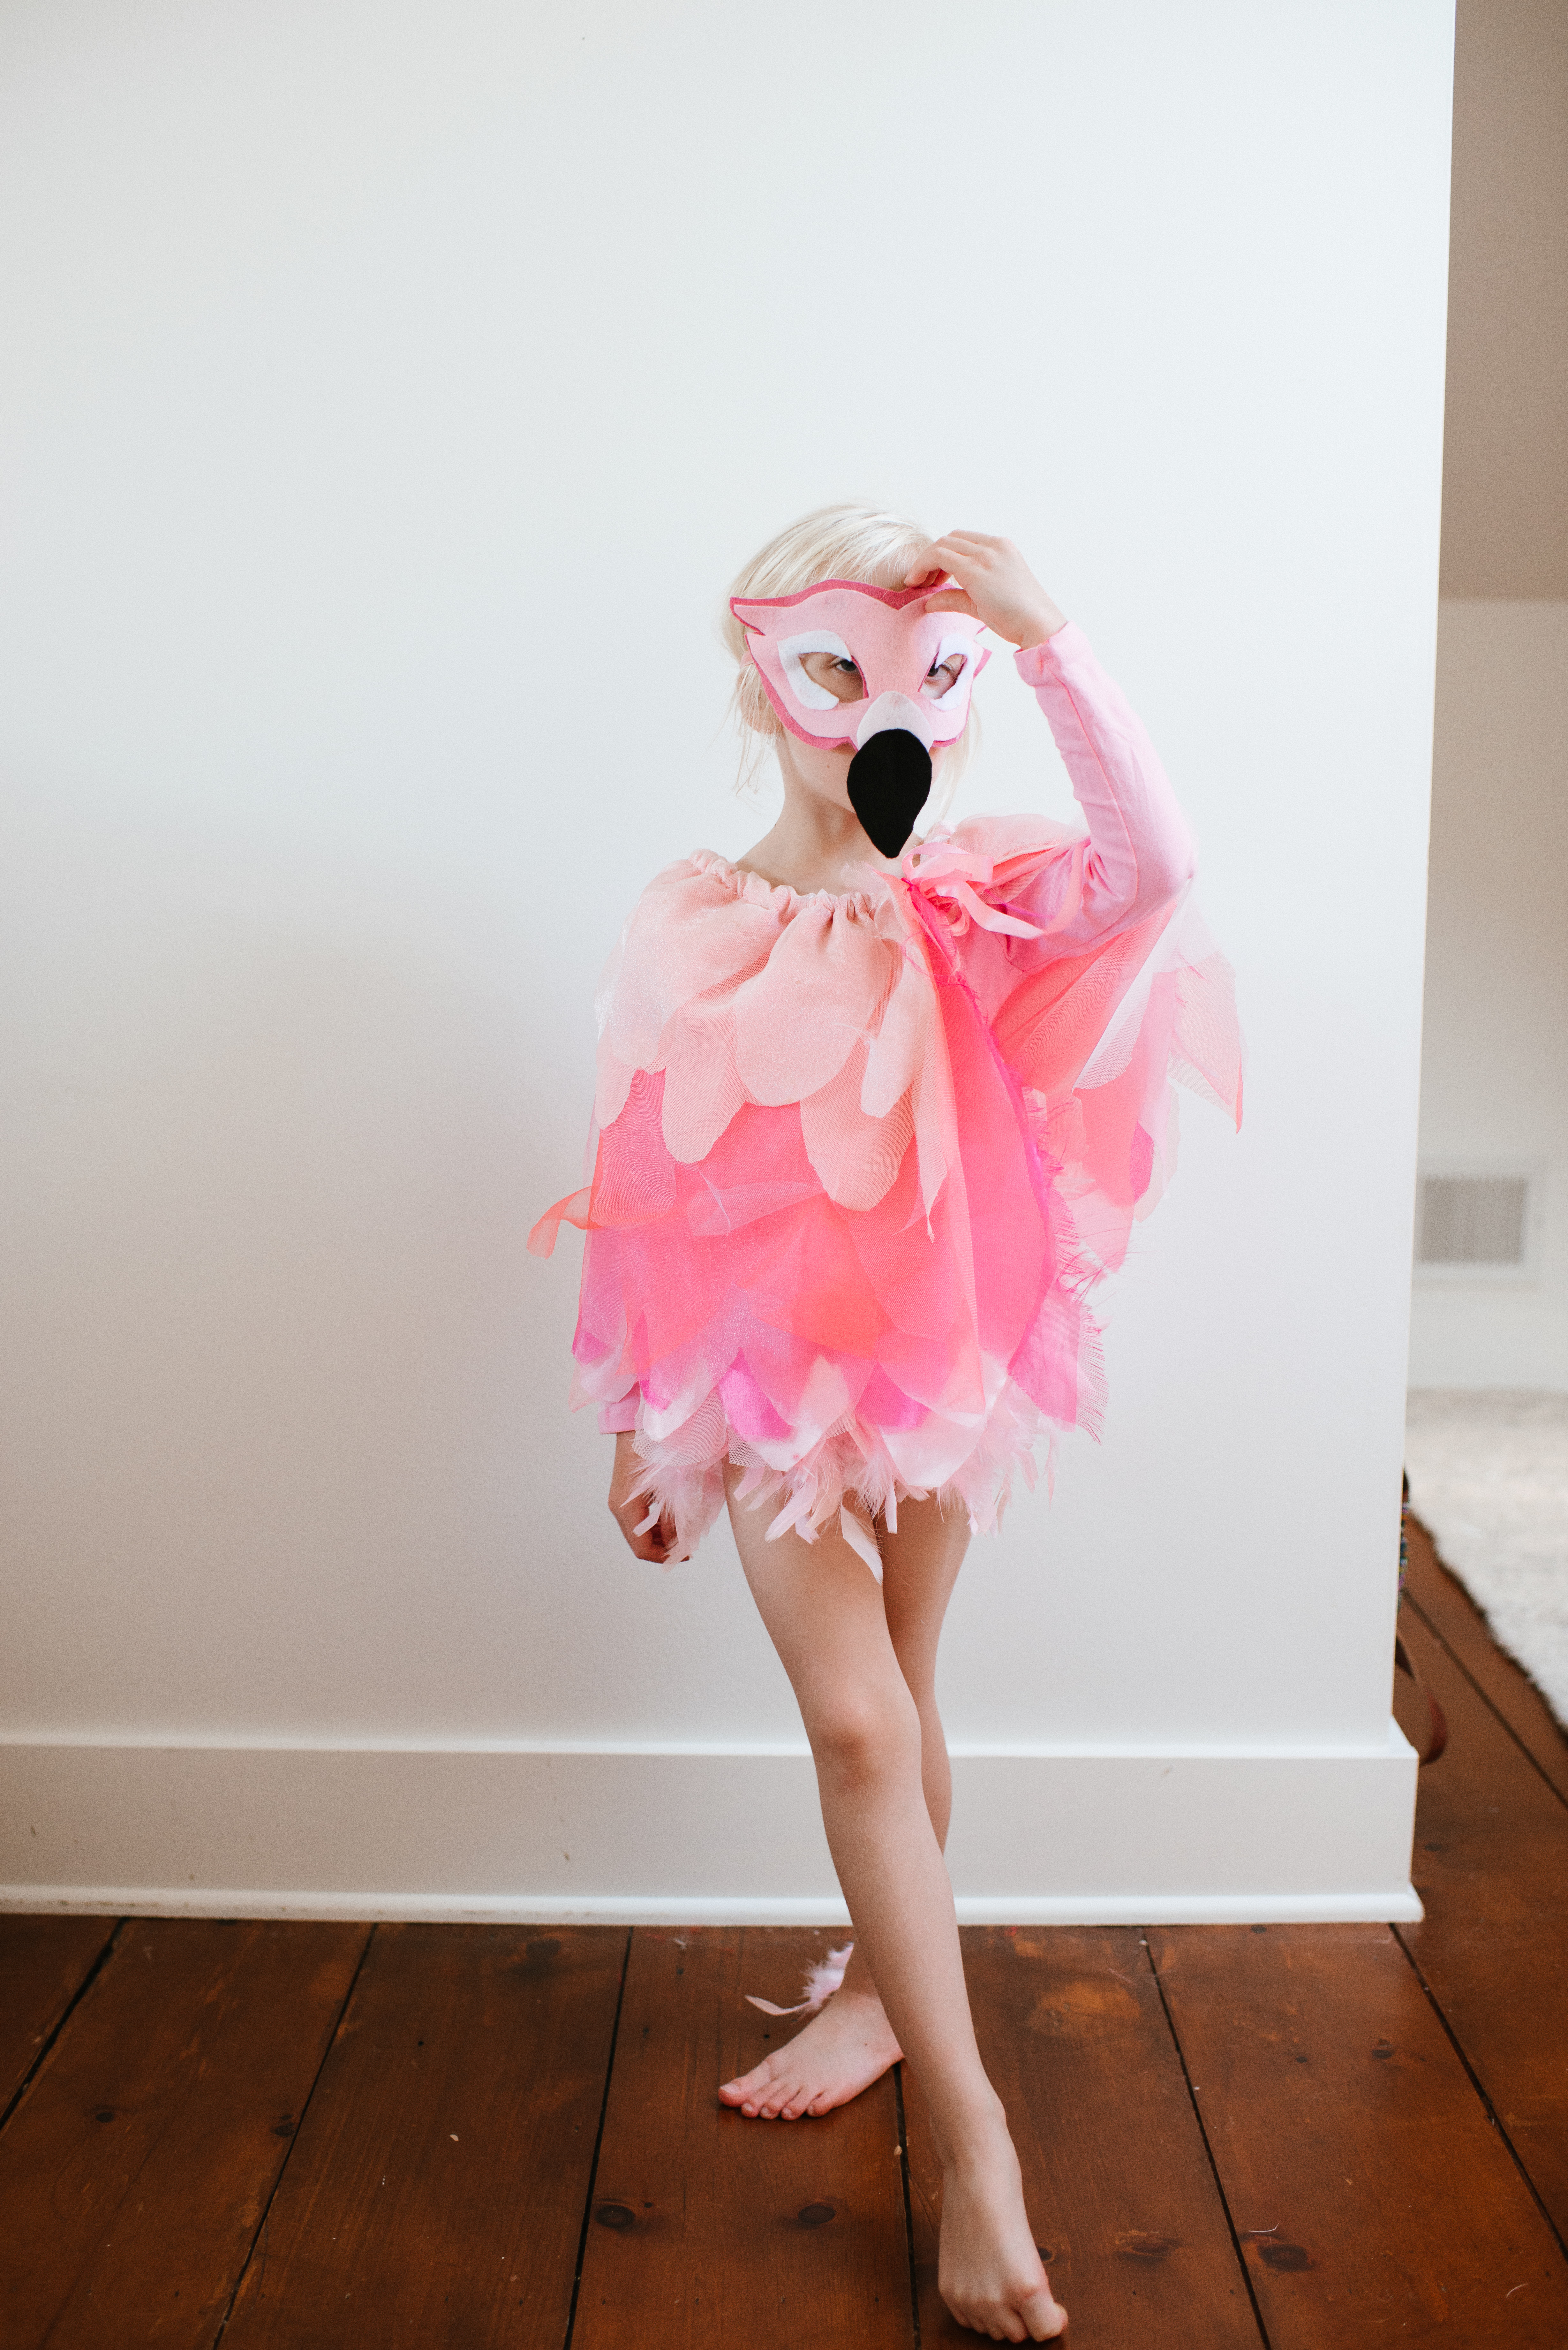
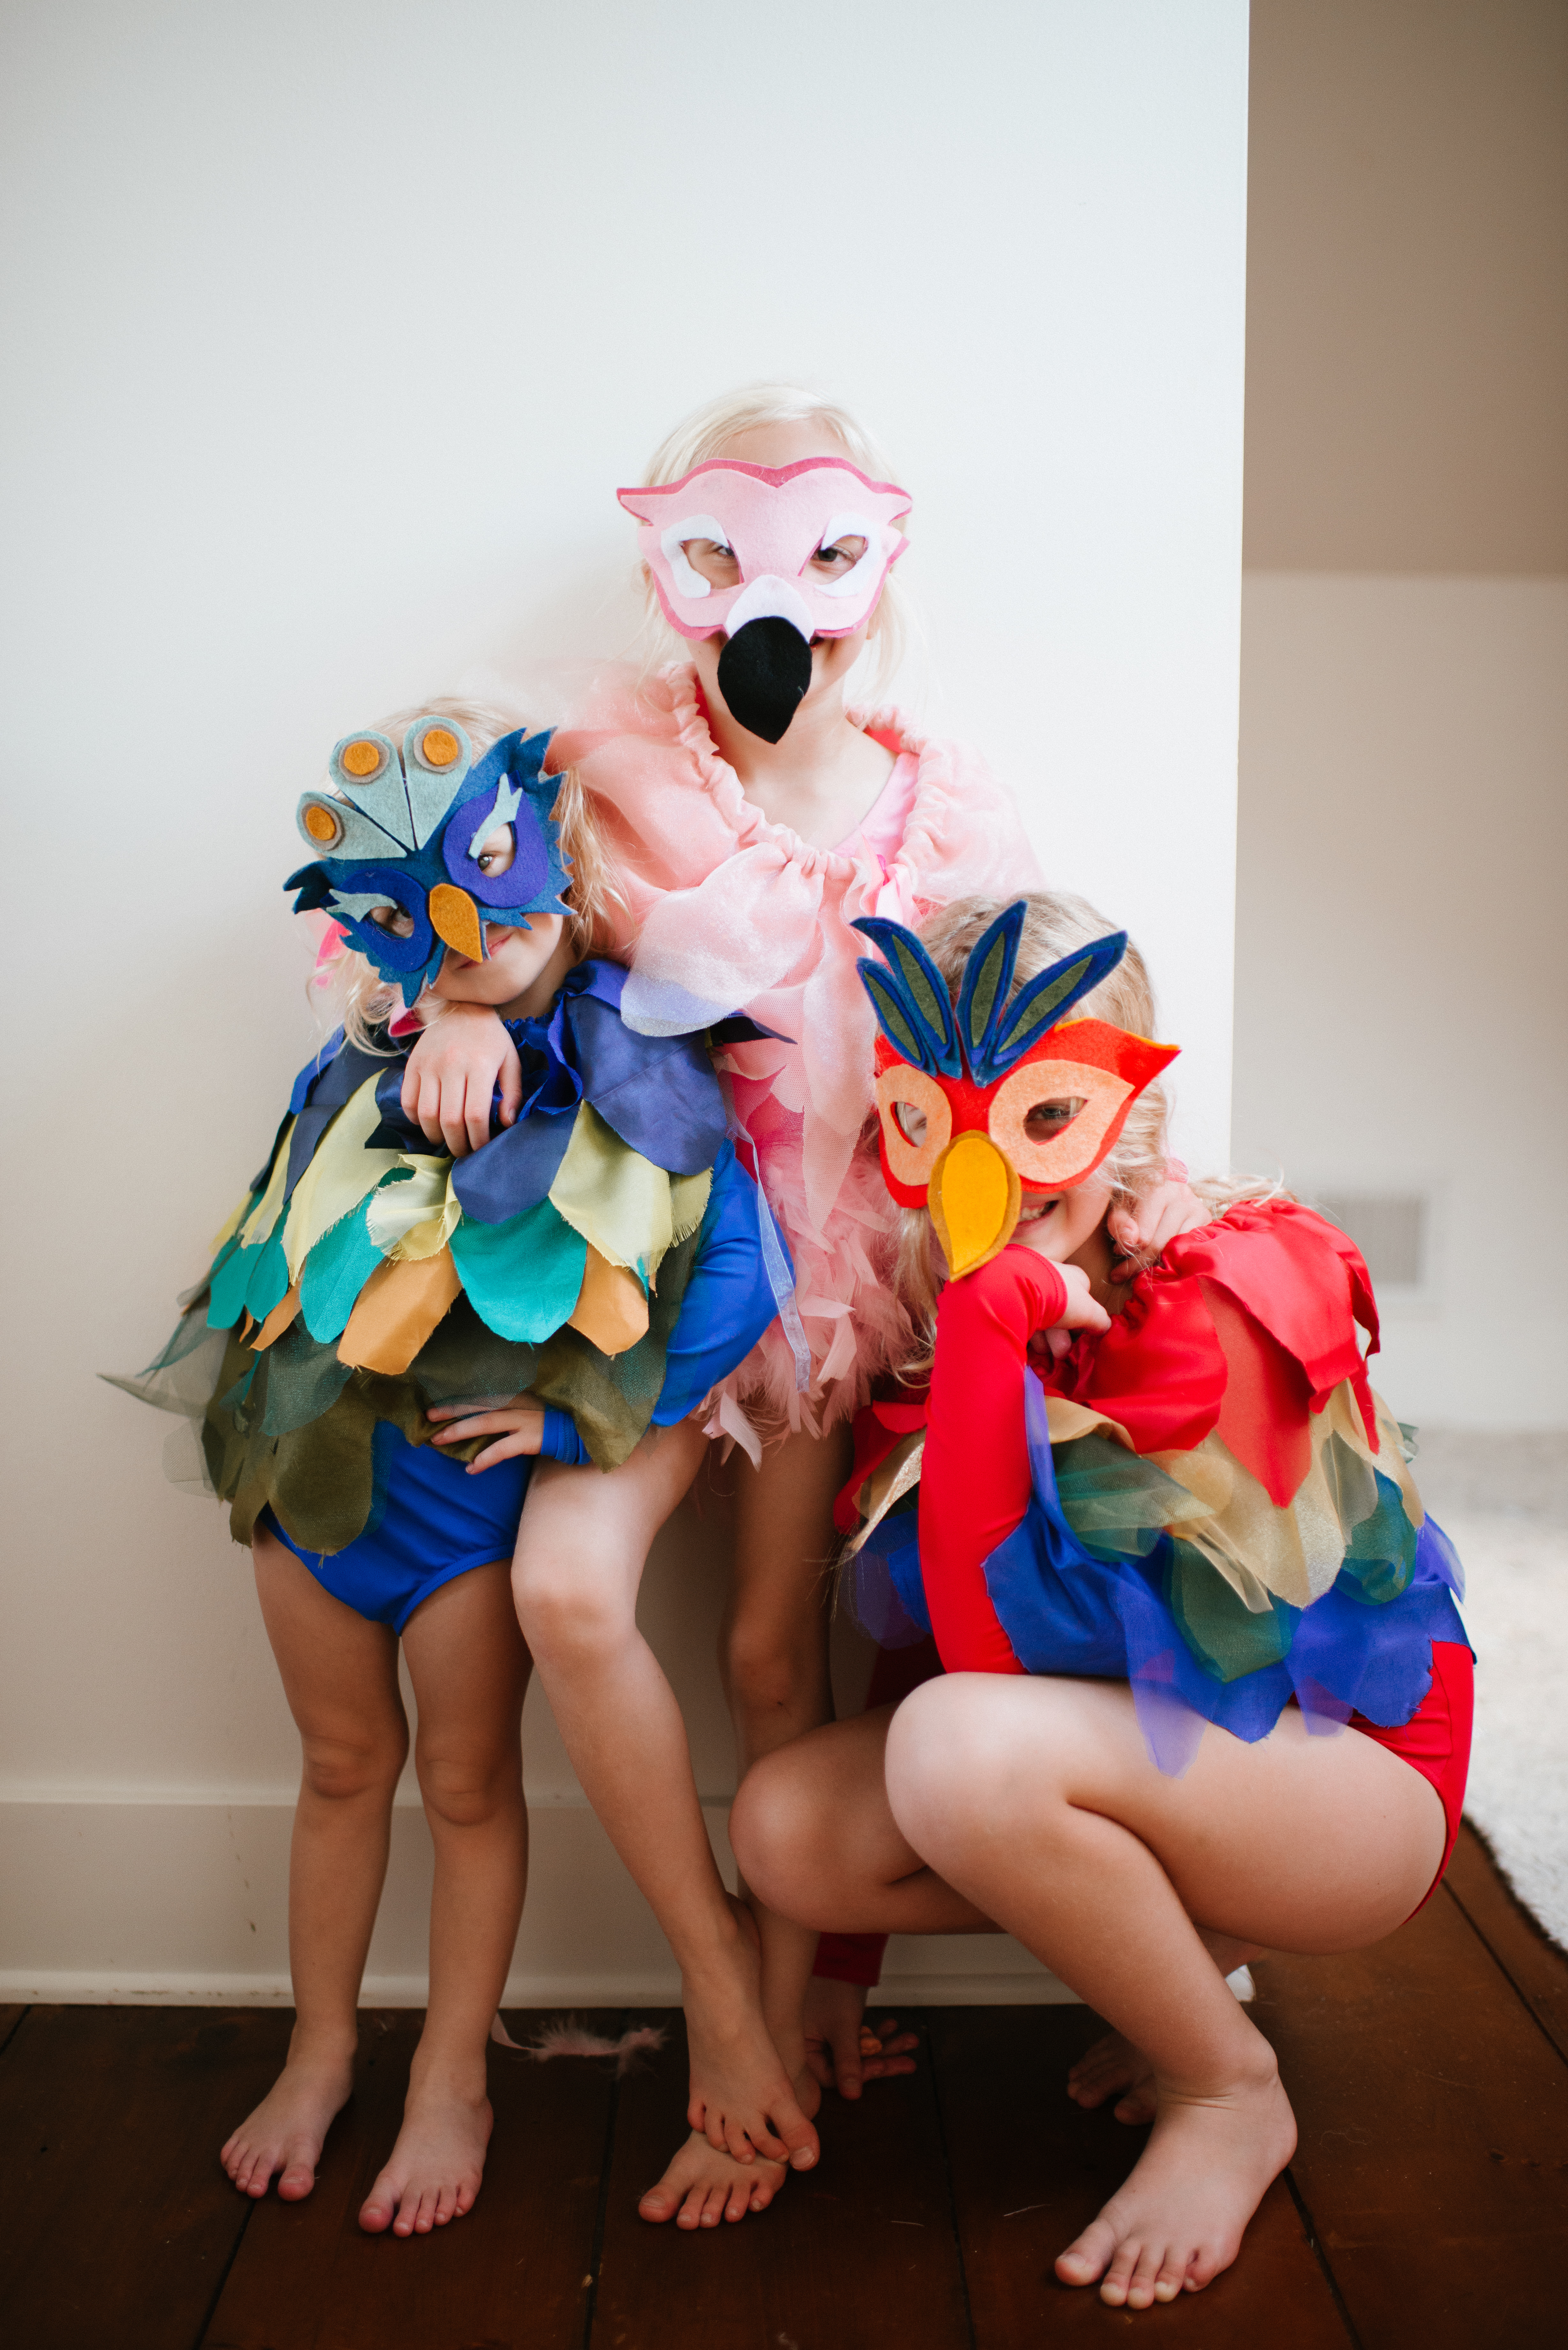
So I’m finally getting around to sharing the details of our Halloween costumes. A big apology for those asking about it. This post has literally been sitting in draft form for weeks. In case you missed it, the girls and I dressed as a flock of birds and Aaron was our protective bird watcher for Halloween. I couldn’t think of a more fitting costume theme for all of us given the season we’re in right now. Aaron and I both felt this year’s costumes were spot on with each of the girl’s personalities, which was fun to see come alive all dressed up. Each girl picked their own bird costume with a little help and direction. I printed off pictures of different birds that I thought would be fun to make as costumes and let them decide which one they wanted to be. I was a little hesitant to let them decide because I didn’t want them to argue over the same bird but to my surprise they each picked differently and everything it worked out really nice.
To make you will need the following :
- colorful fabric in a variety of color + shades
- ribbon (used for the cape)
- sewing machine or fabric glue (sewing machine is recommended)
- felt fabric (I recommend using a heavier weight felt)
- elastic ribbon for the facial masks
- hot glue gun
How to make :
Let’s start with the mask, shall we? I started with a basic template I found via pinterest + google search and made adjustments where I wanted. You can see them below.

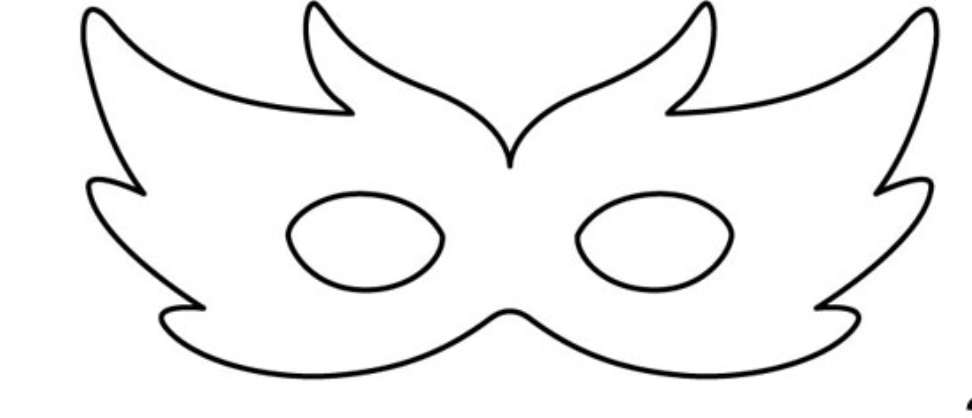
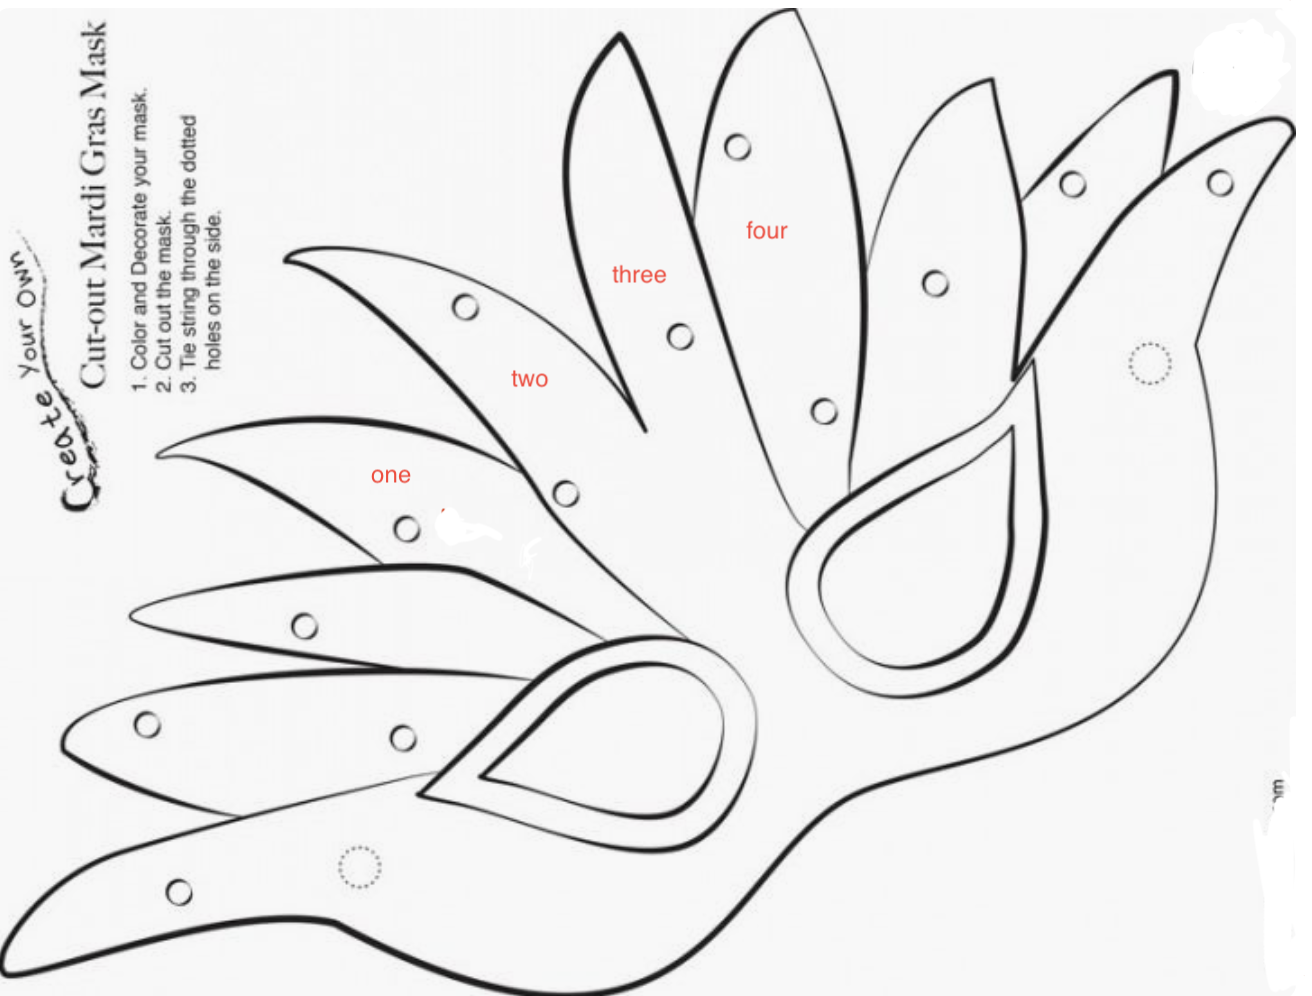
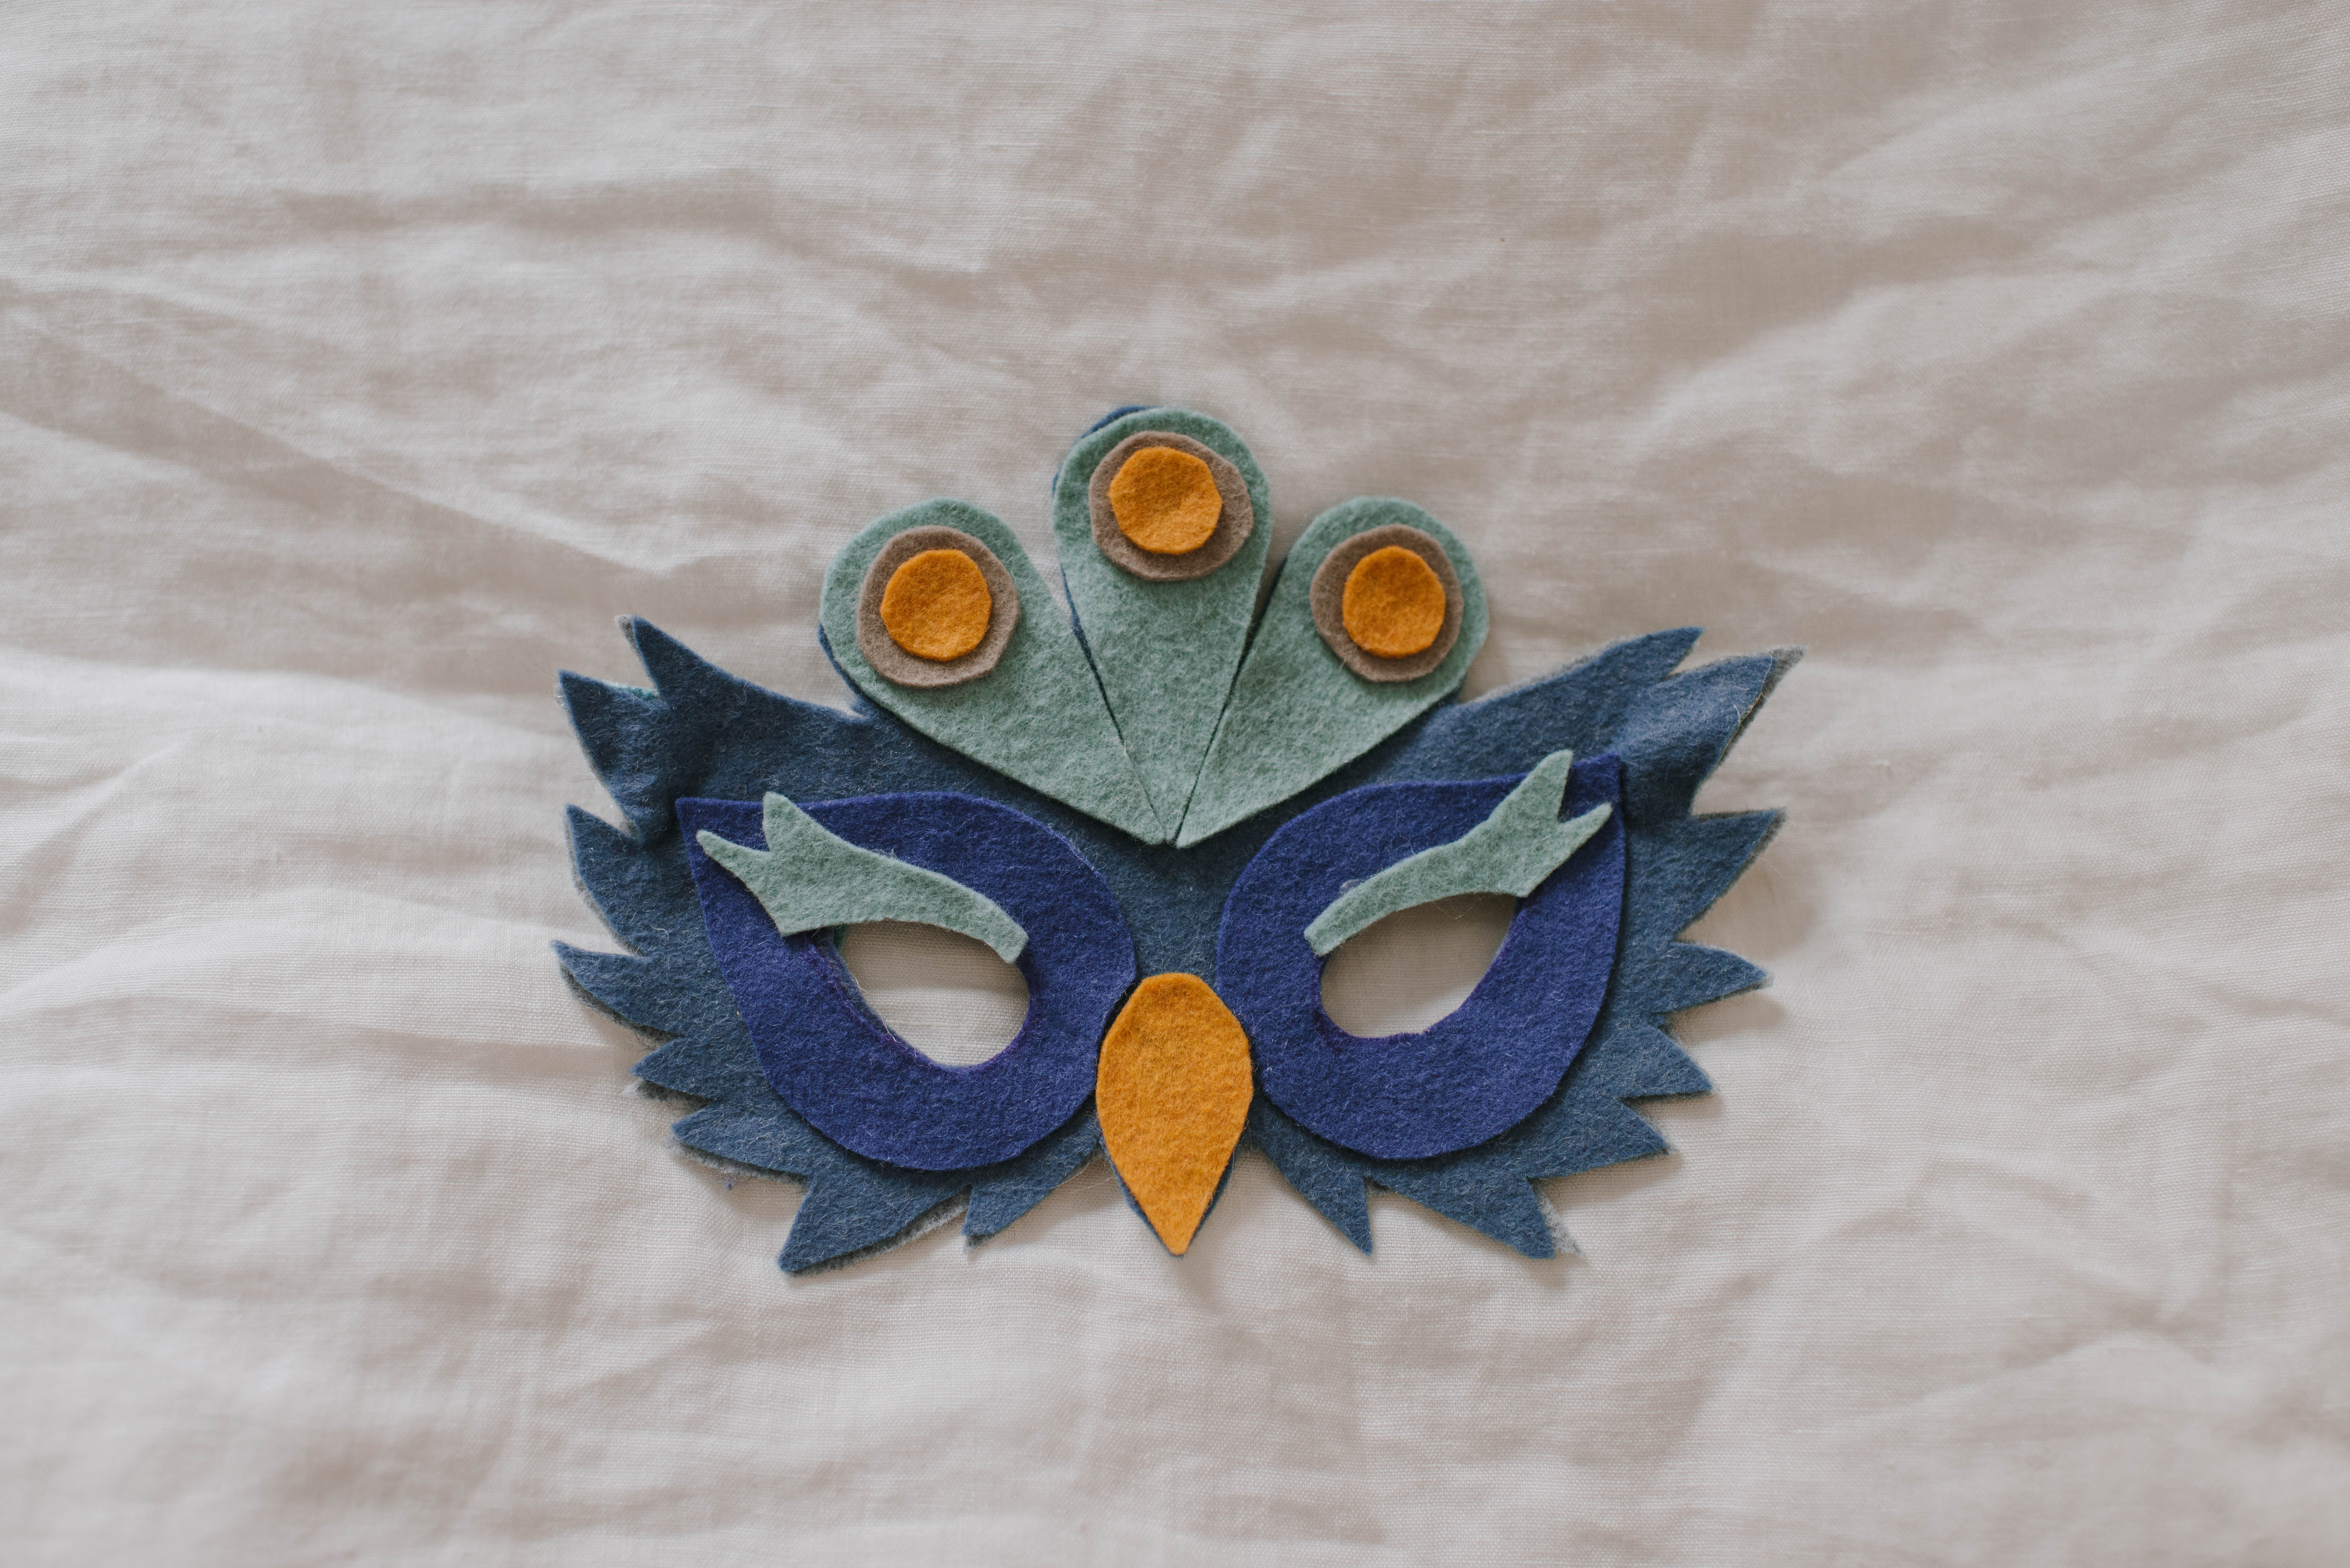
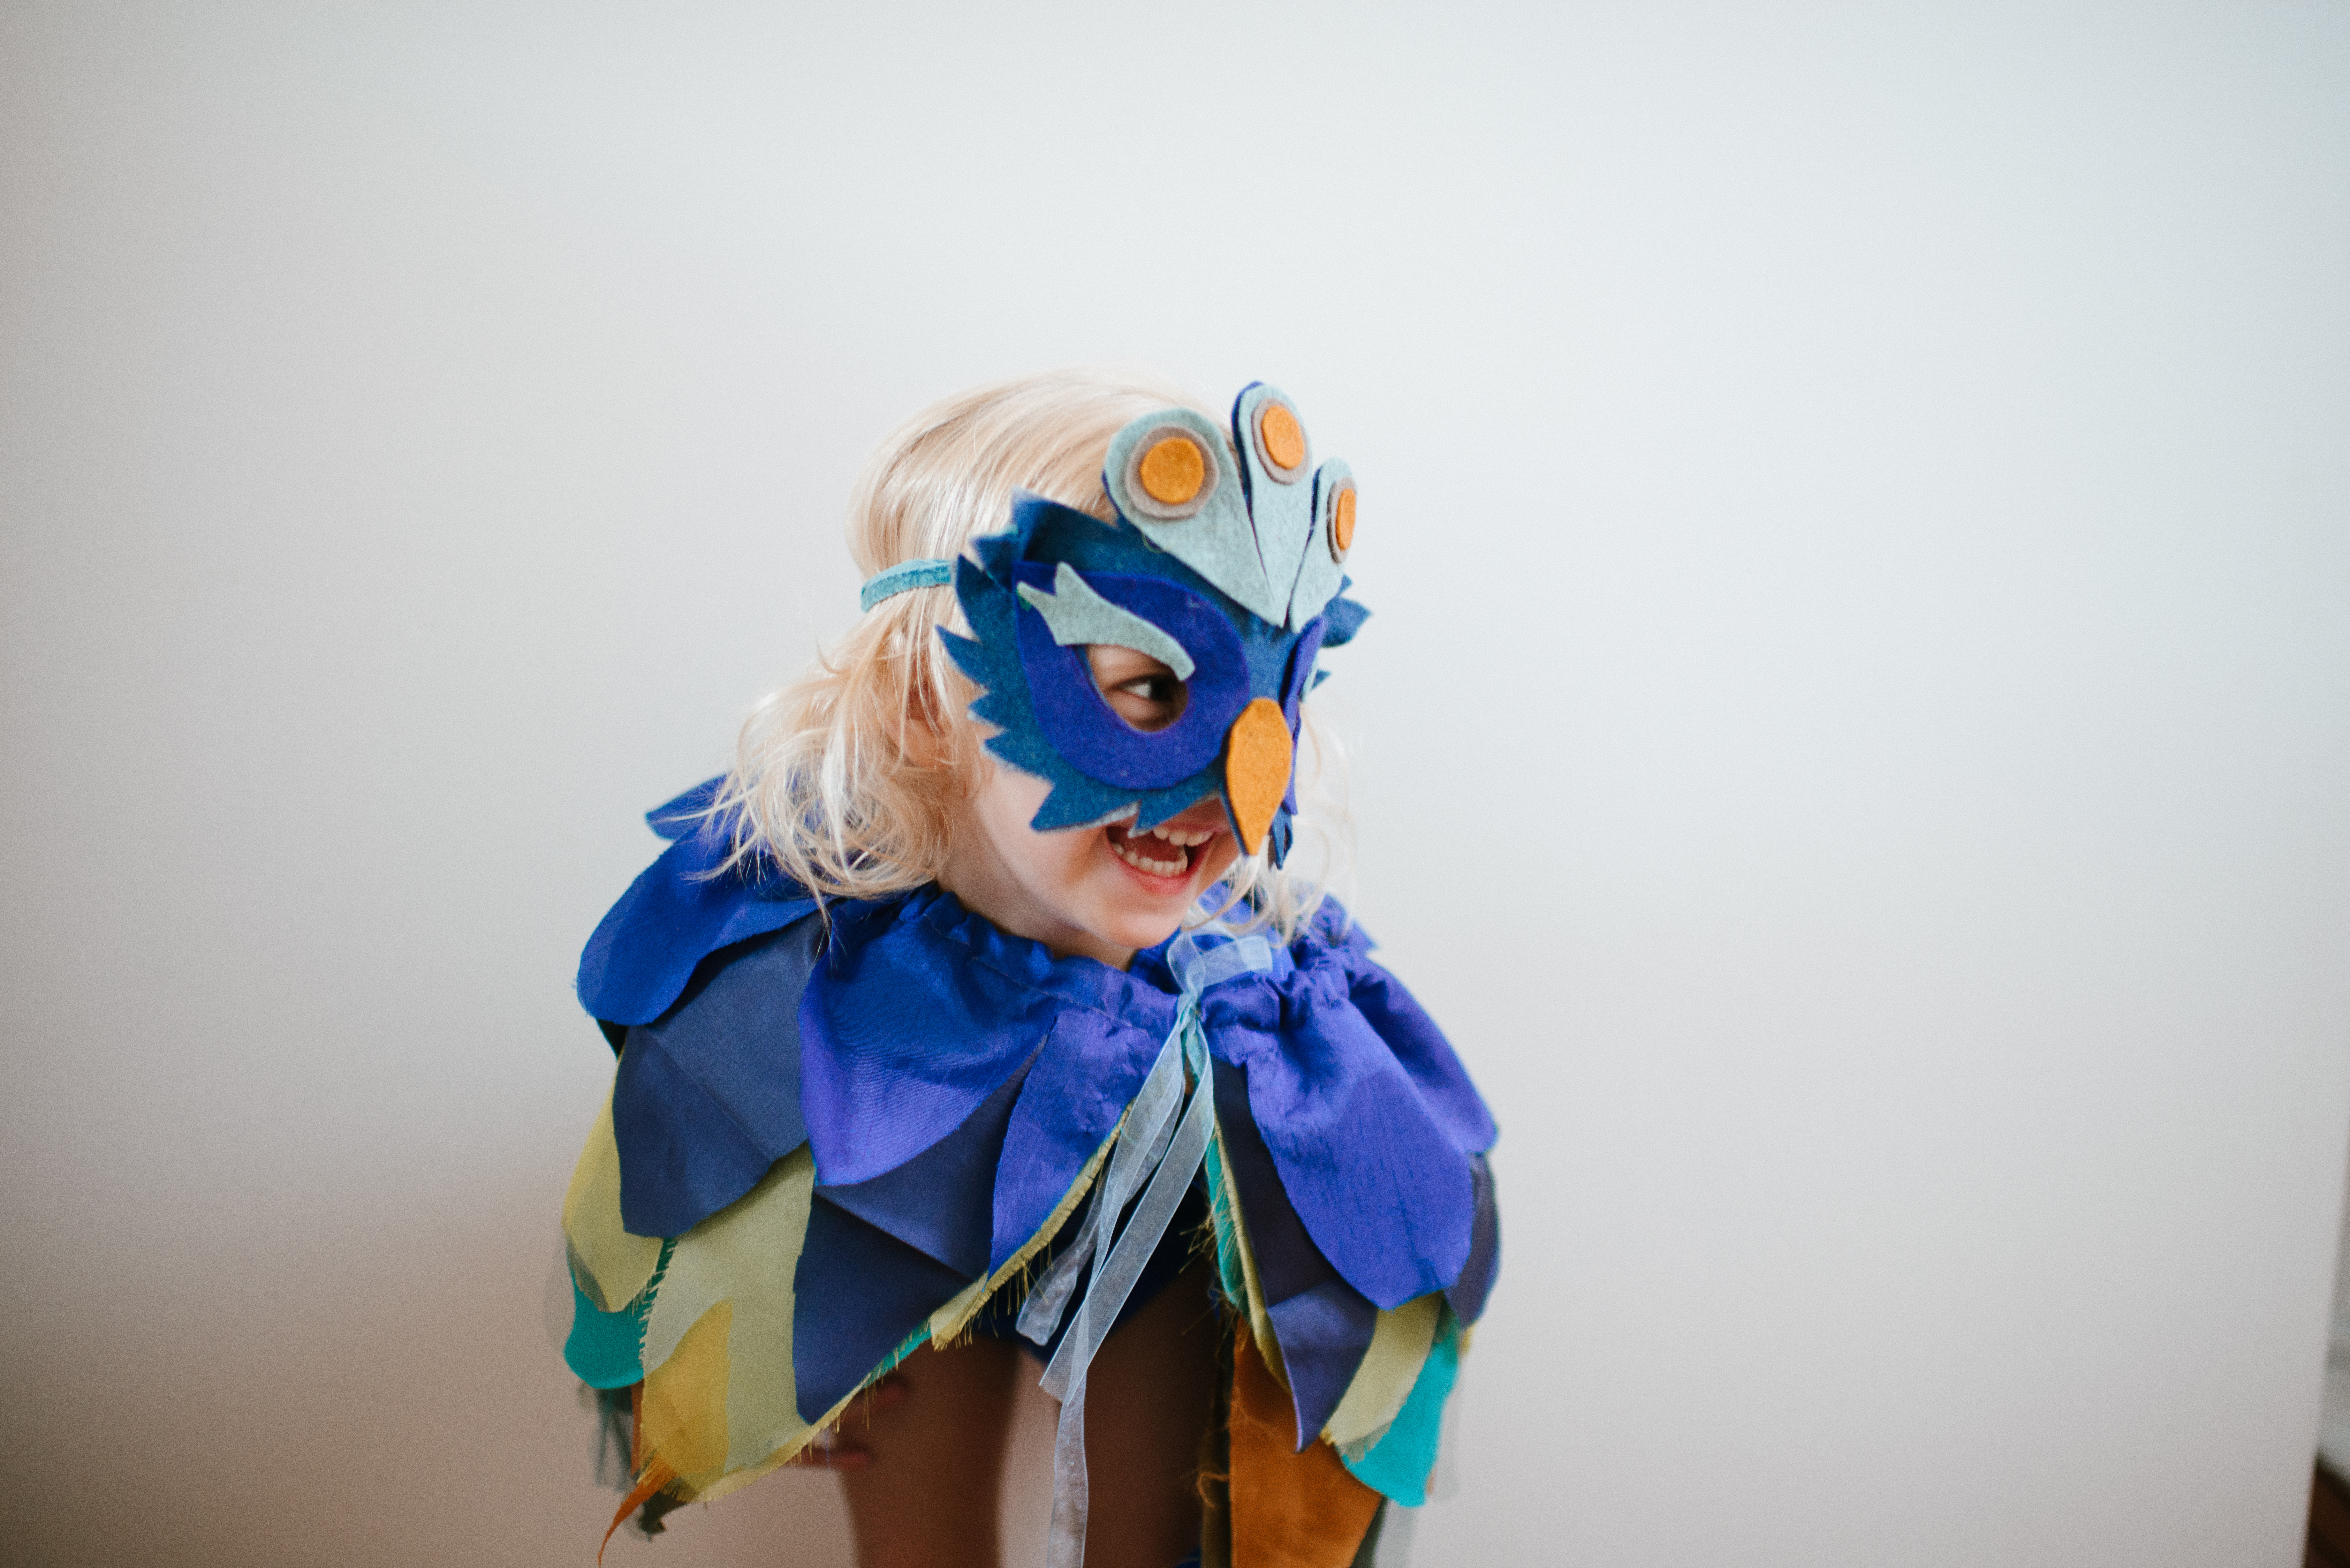
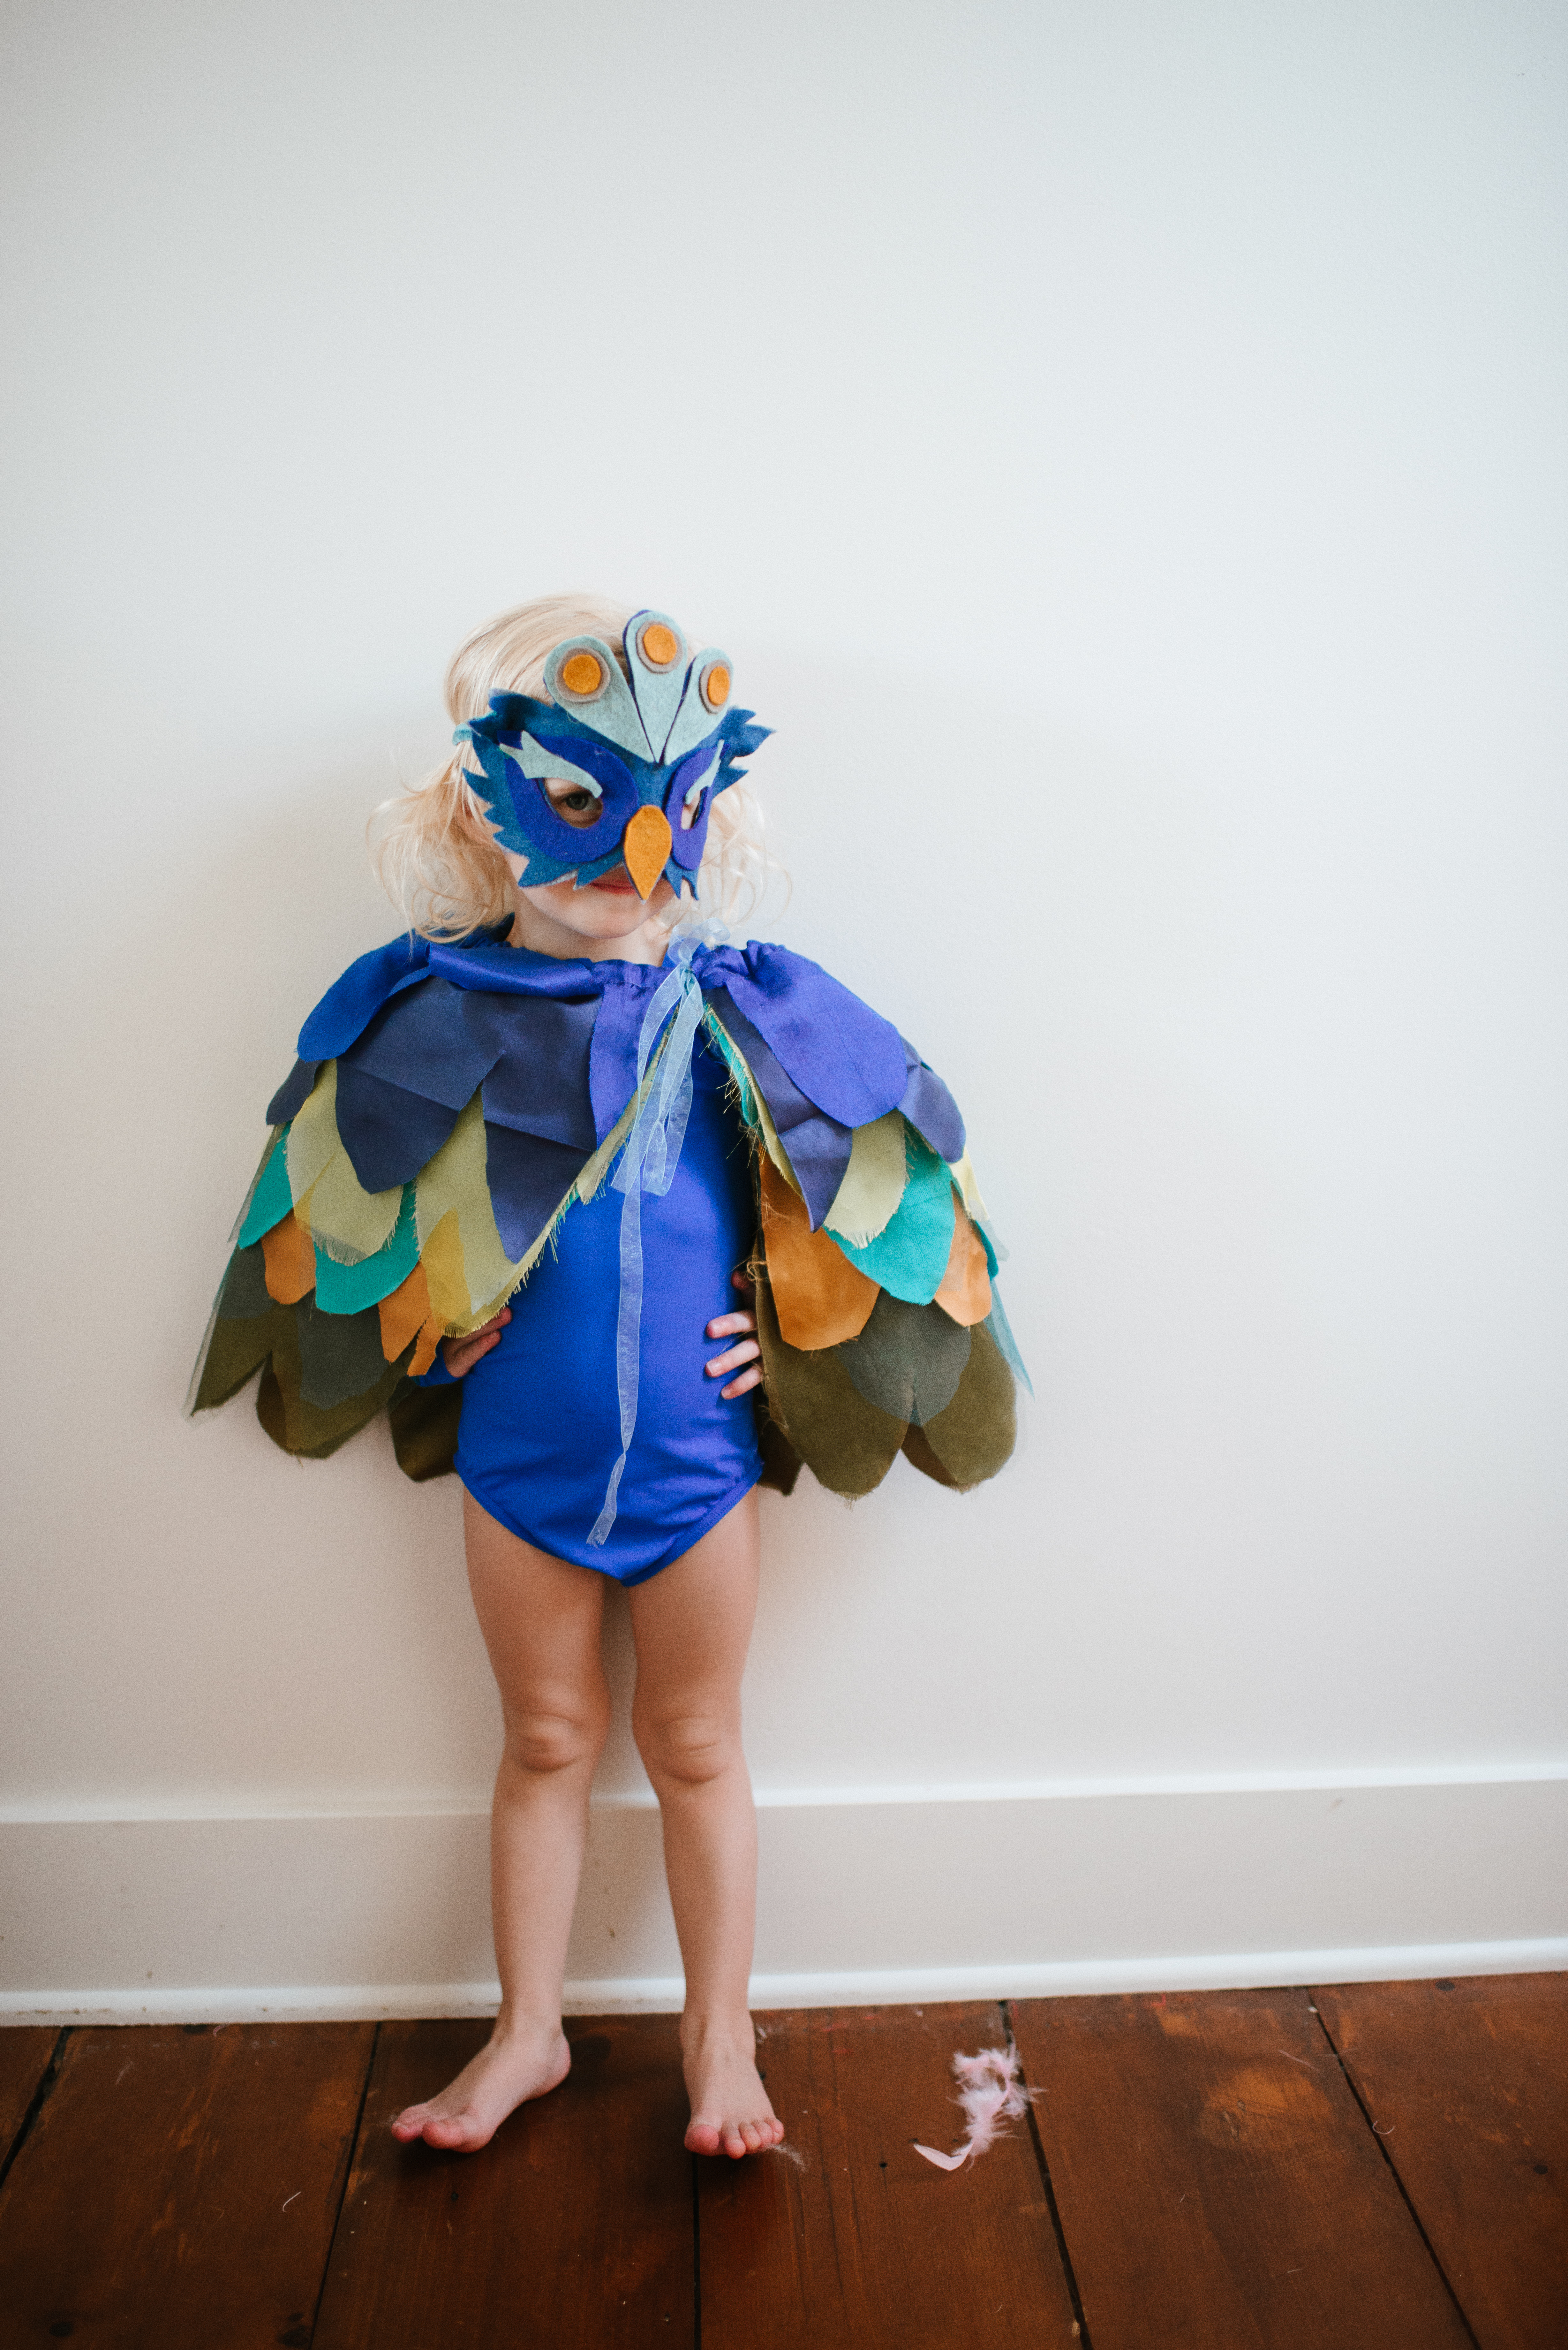
For the peacock mask I followed the first template exactly. You can simply print the image off in this post to use and create your own.
As for the scarlett macaw, flamingo, and white swan masks, they are all similar in shape I just tweaked certain details to make each their own.
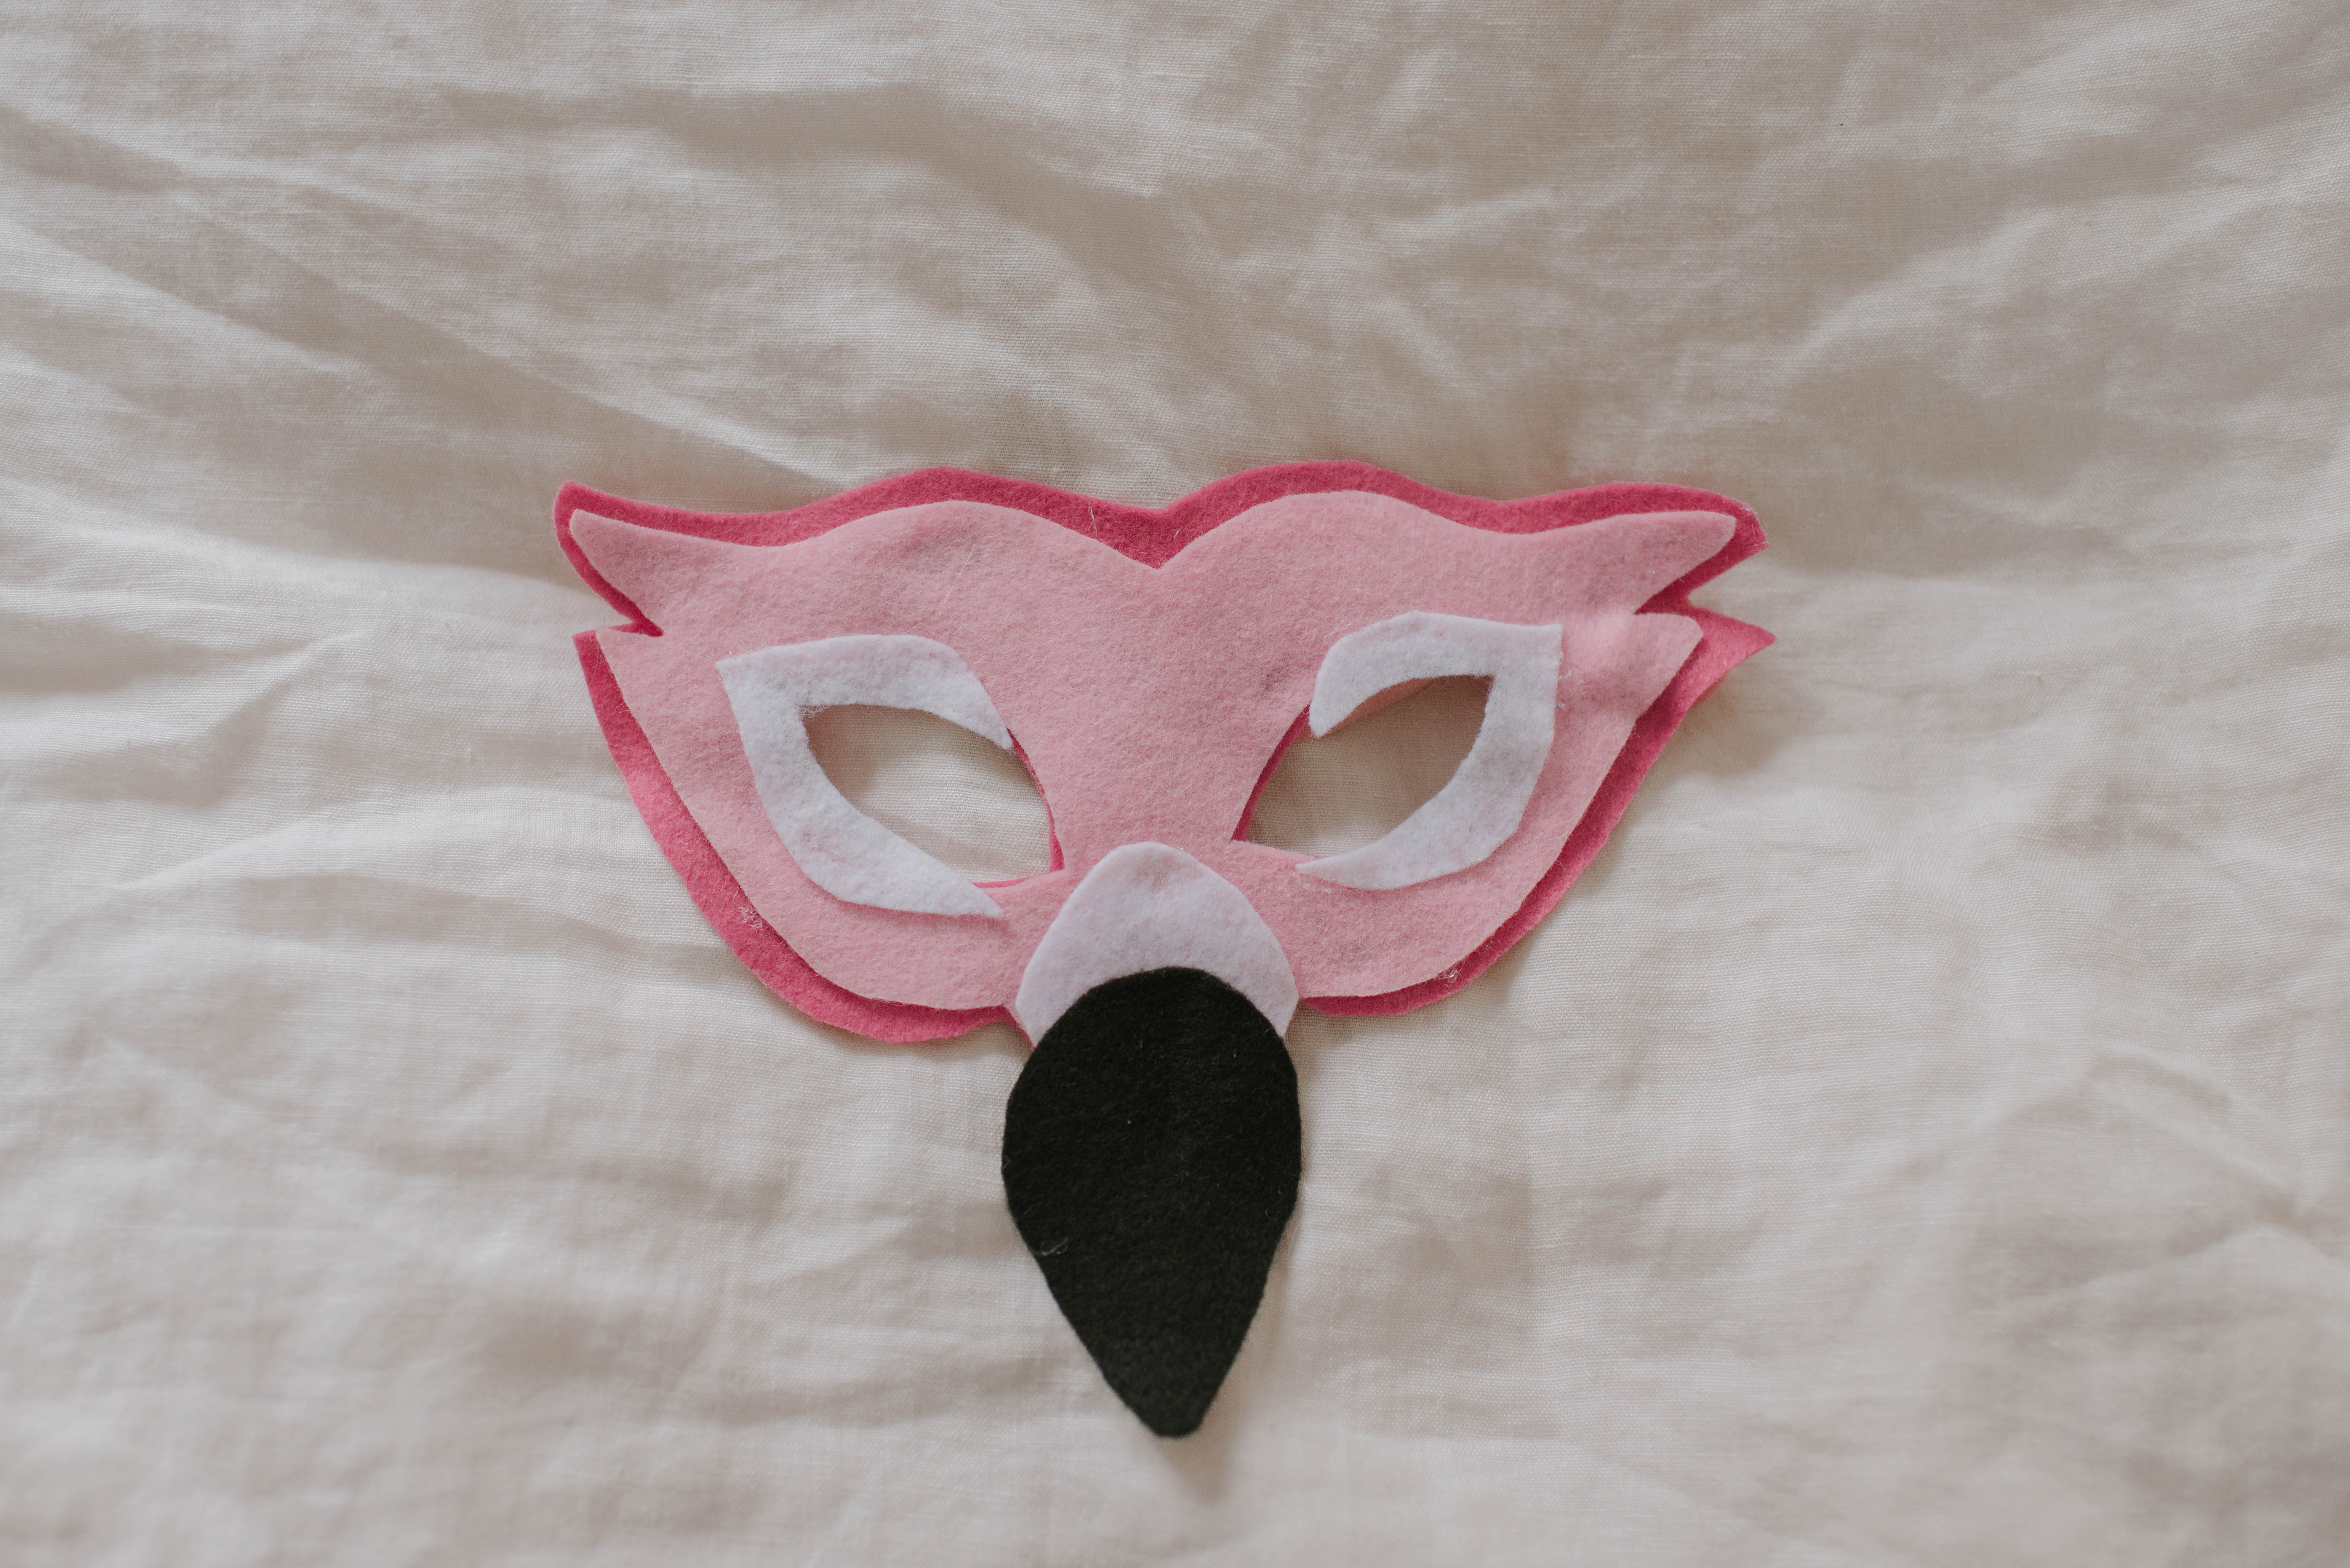
For the flamingo I worked off of the second template for the basic shape of the mask. I adjusted some details to simplify it and used the detail around the eye from the peacock costume. For the beak of the flamingo I used the shape of the eyes in the third template, creating two different sizes and layered them. The black part of the beak is slightly bigger than the white. I also decided to layer the base of the mask with two shades of pink. I did this for two reasons. One, I thought it added more depth and character to the mask. And two, I was able to hide where I tied the elastic ribbon, leaving it look more finished and clean.
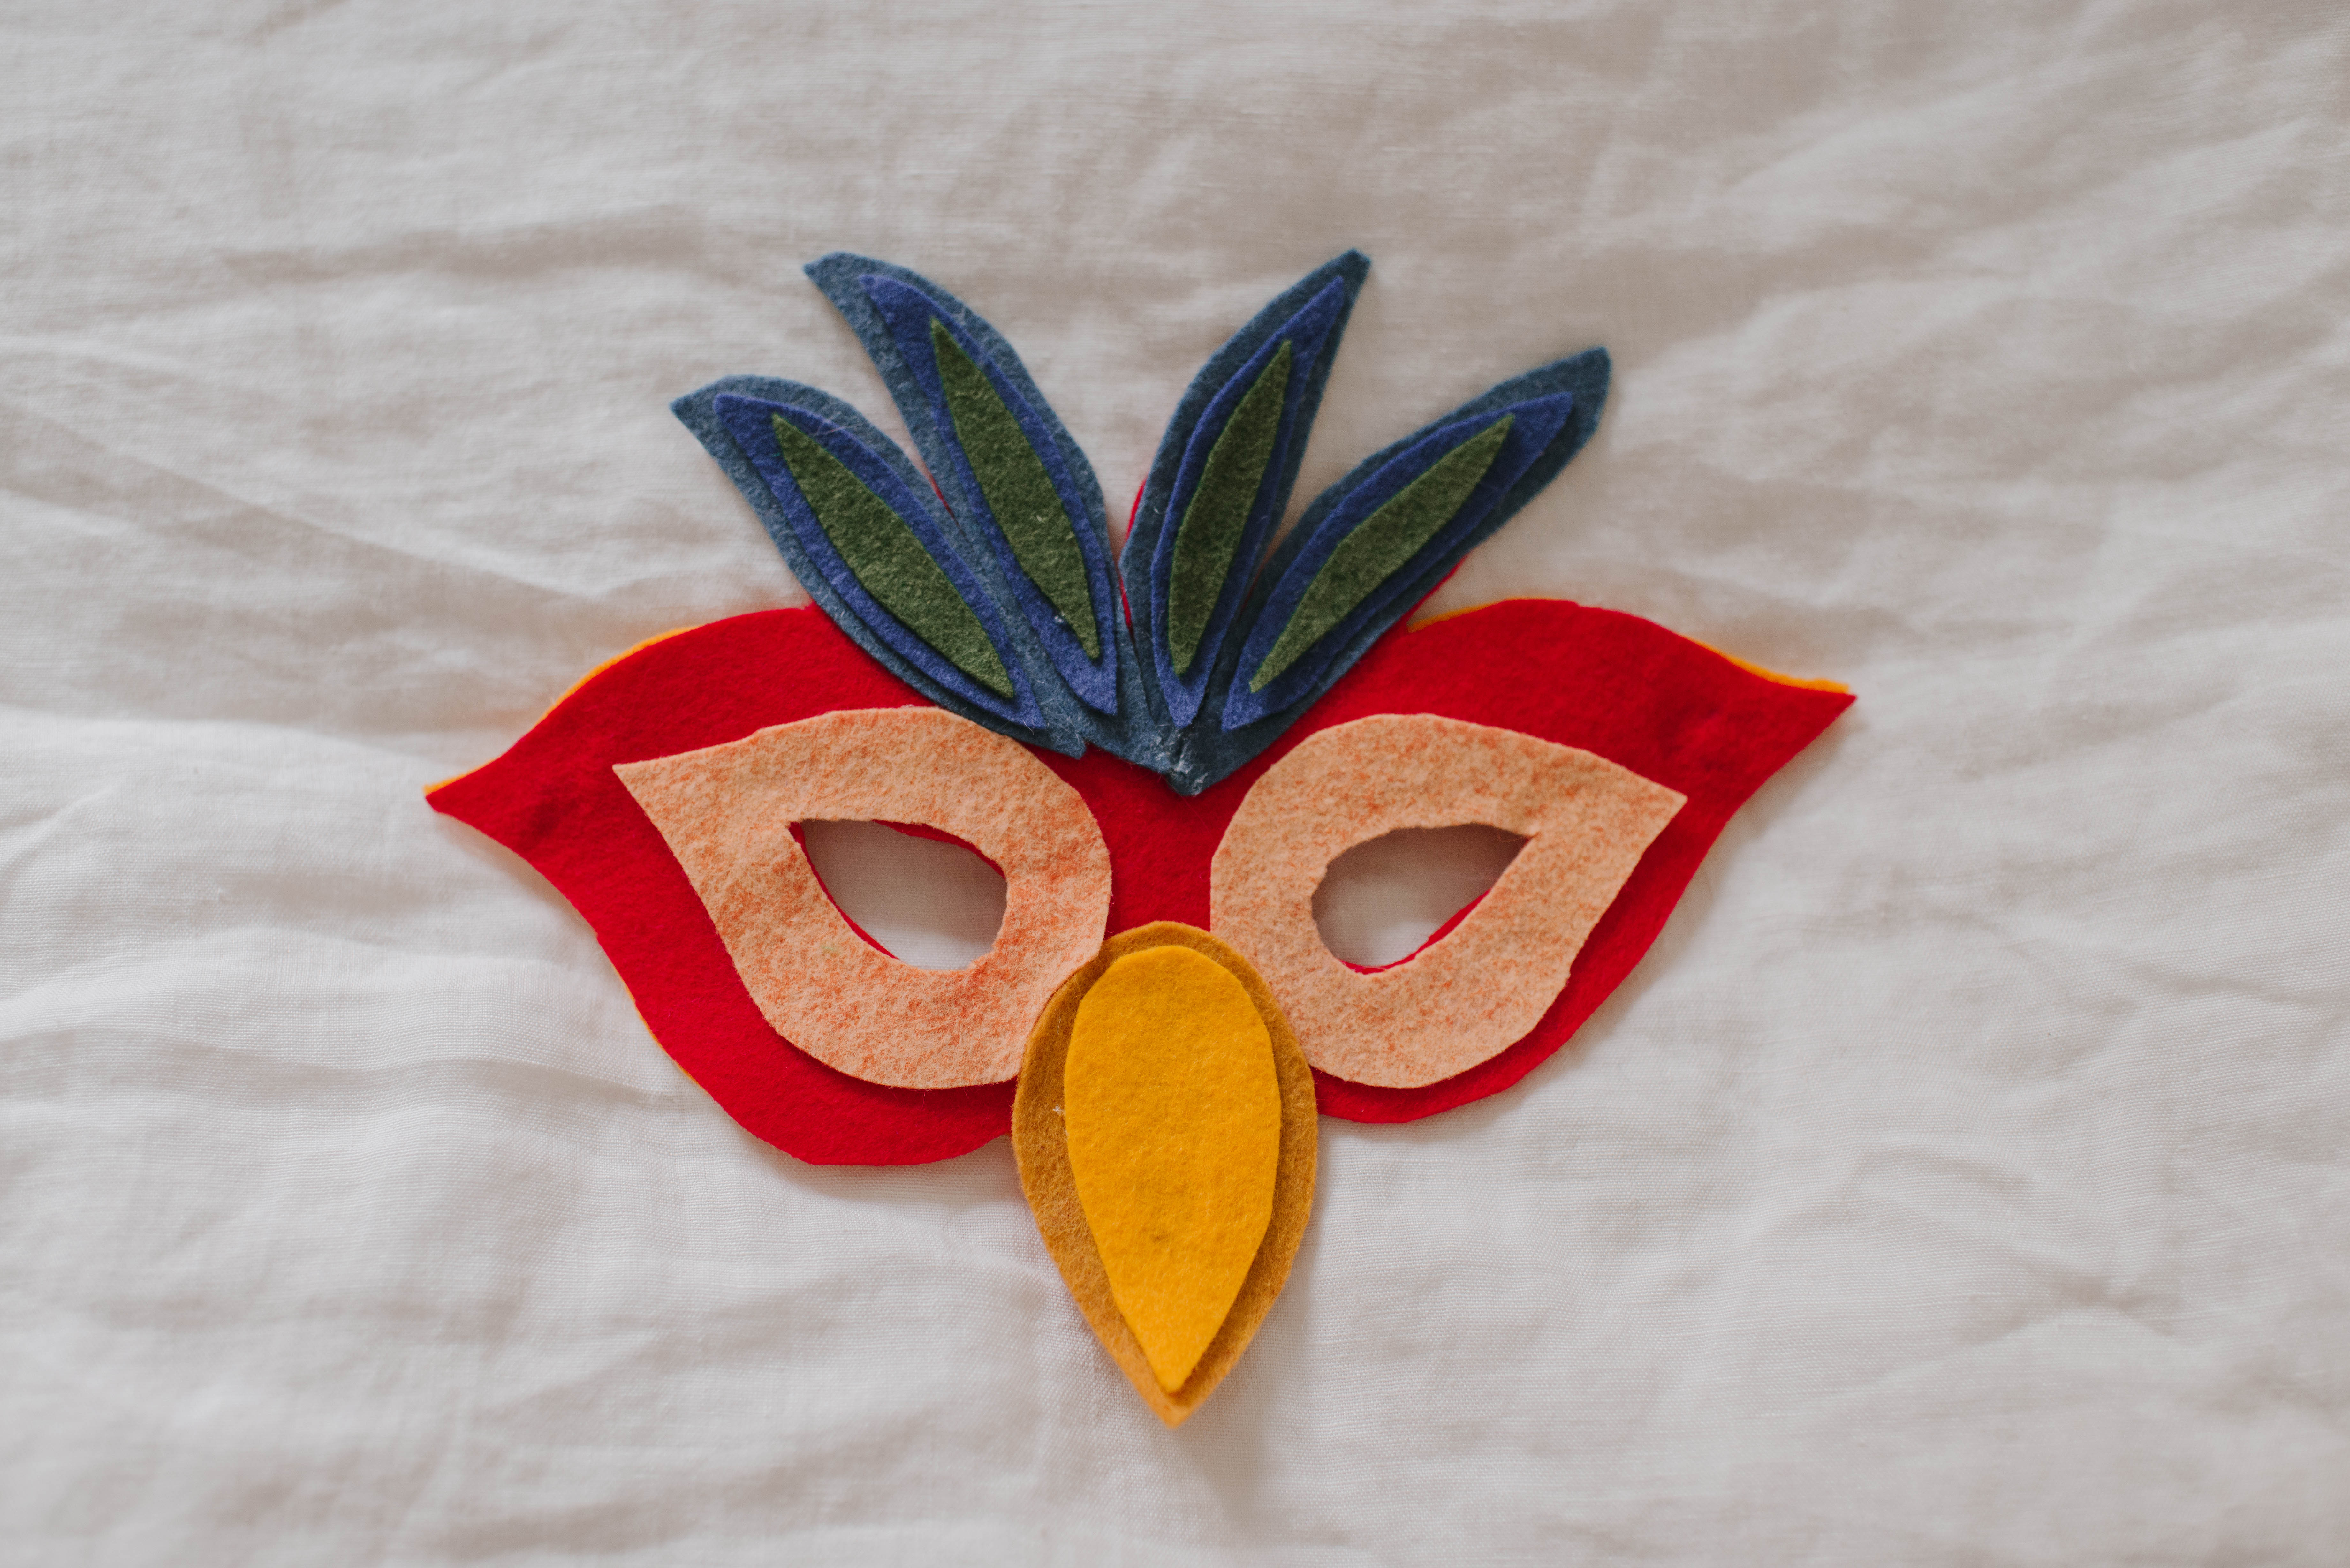
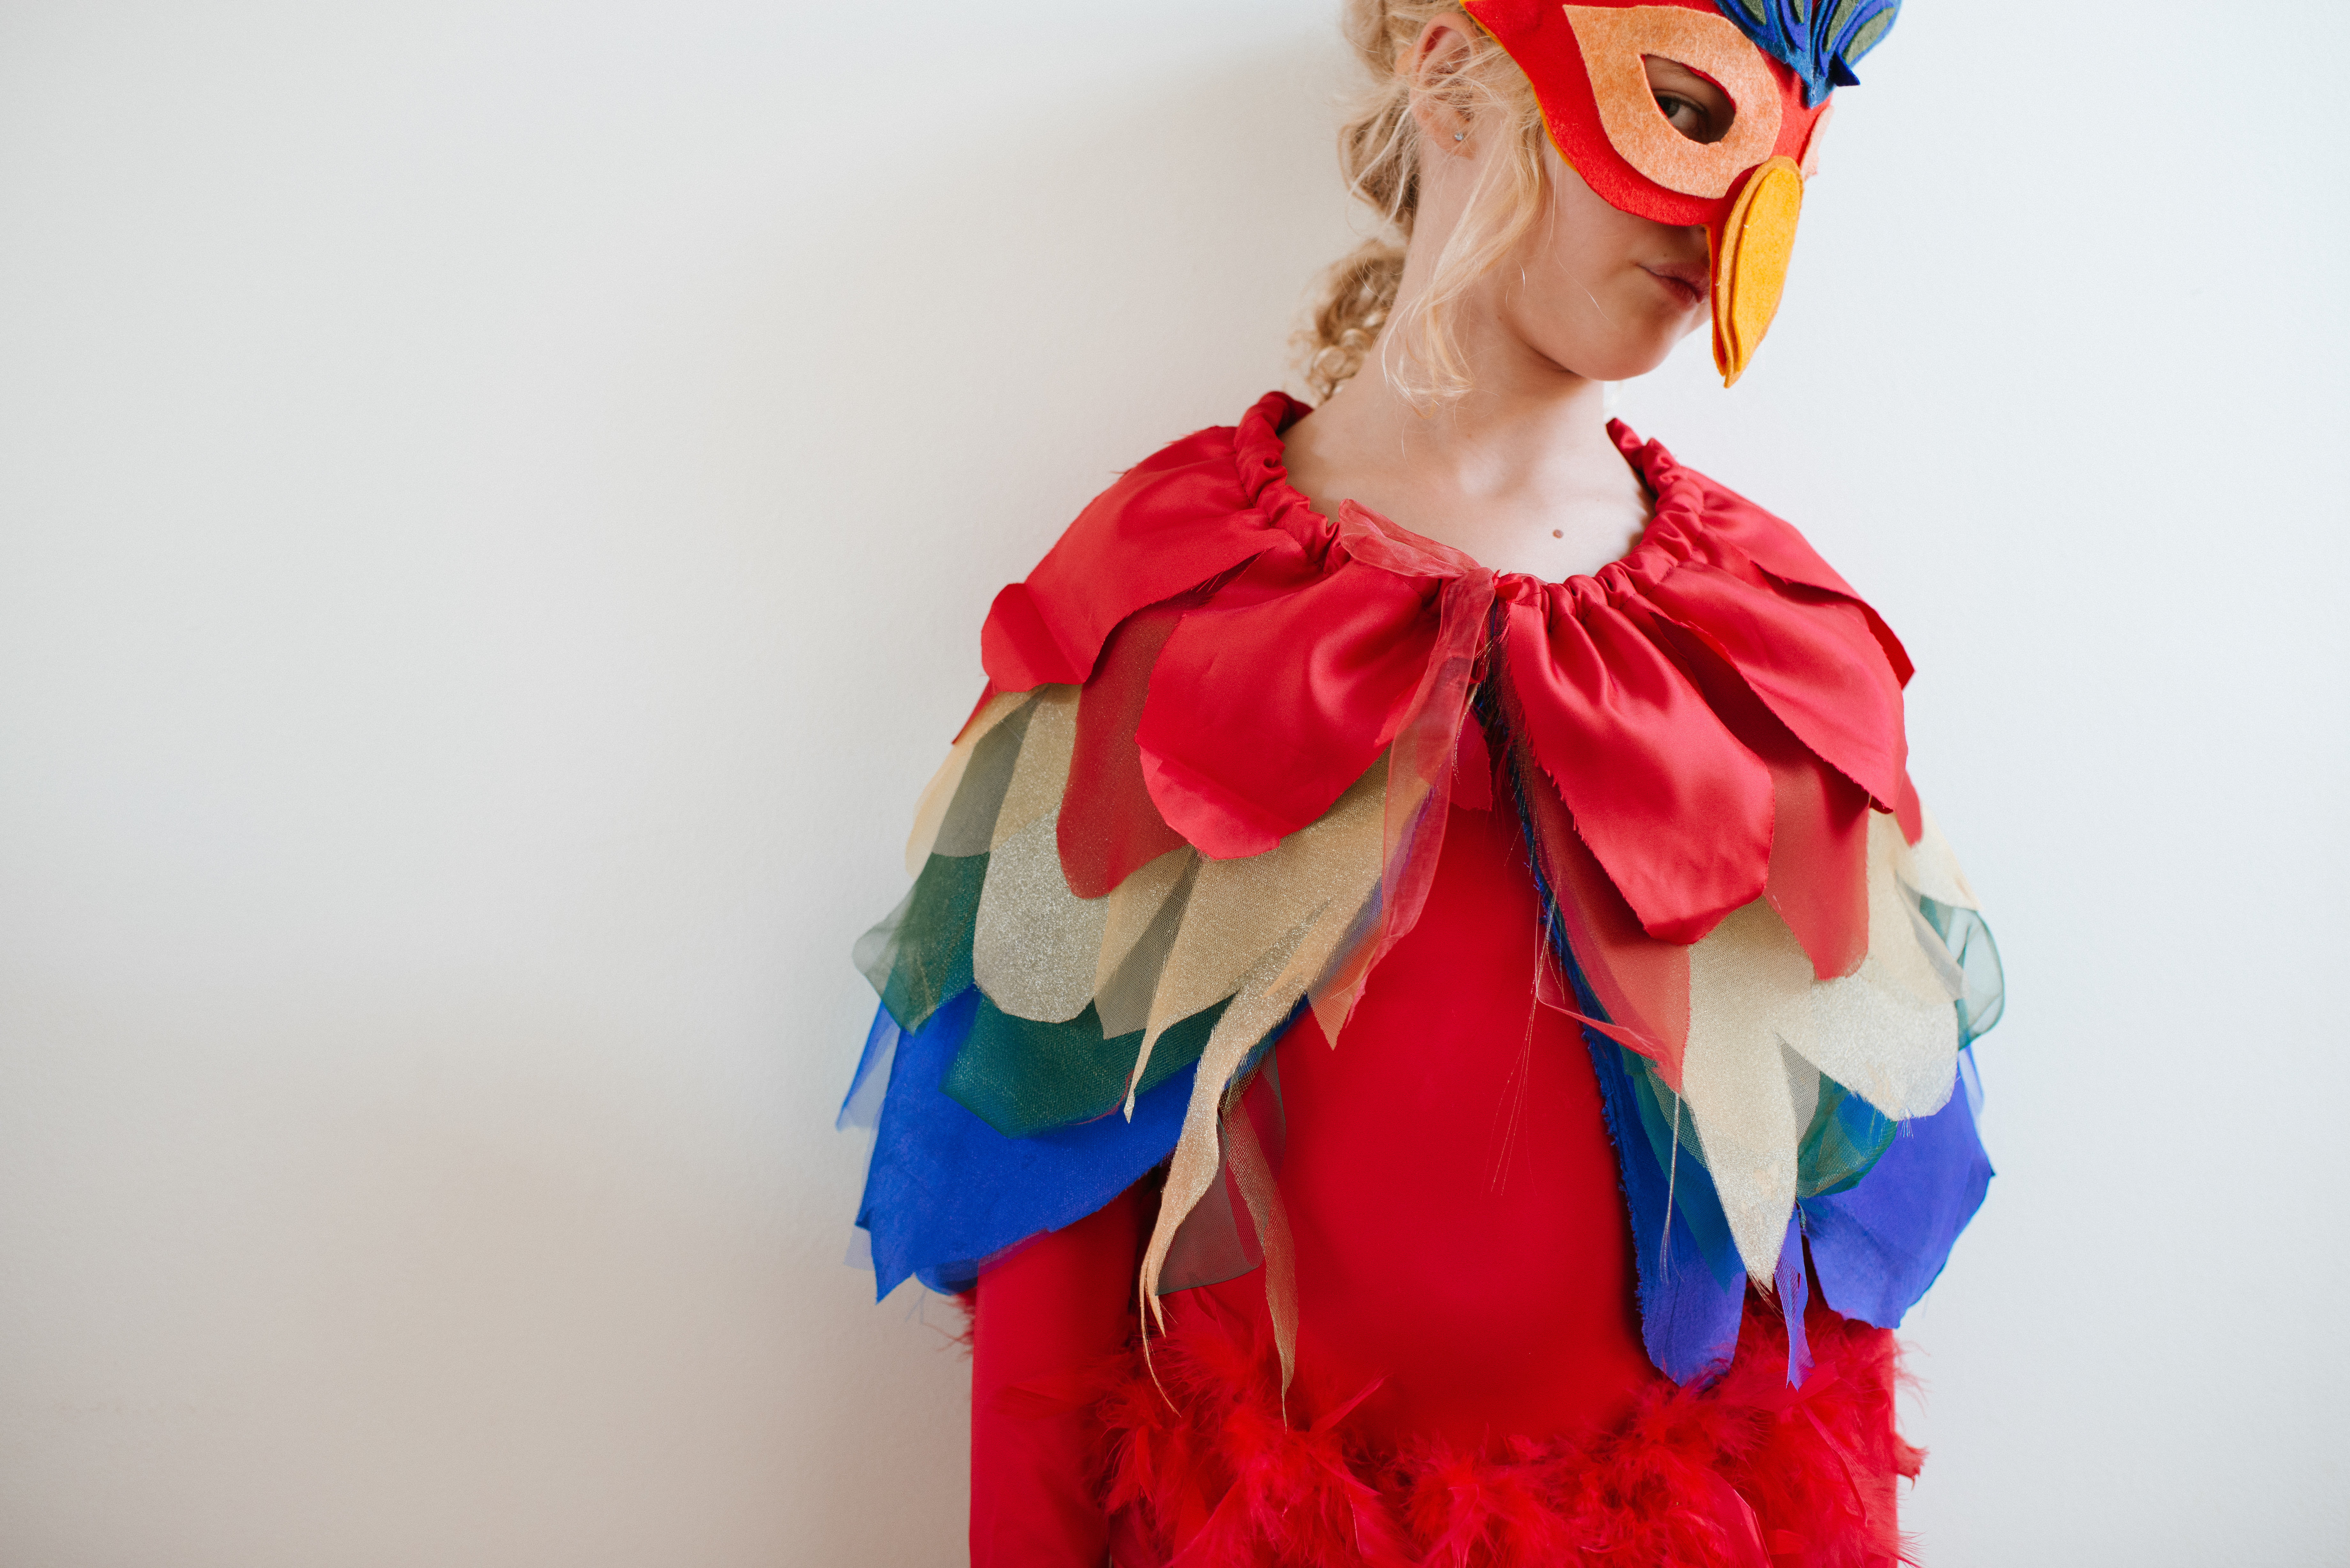
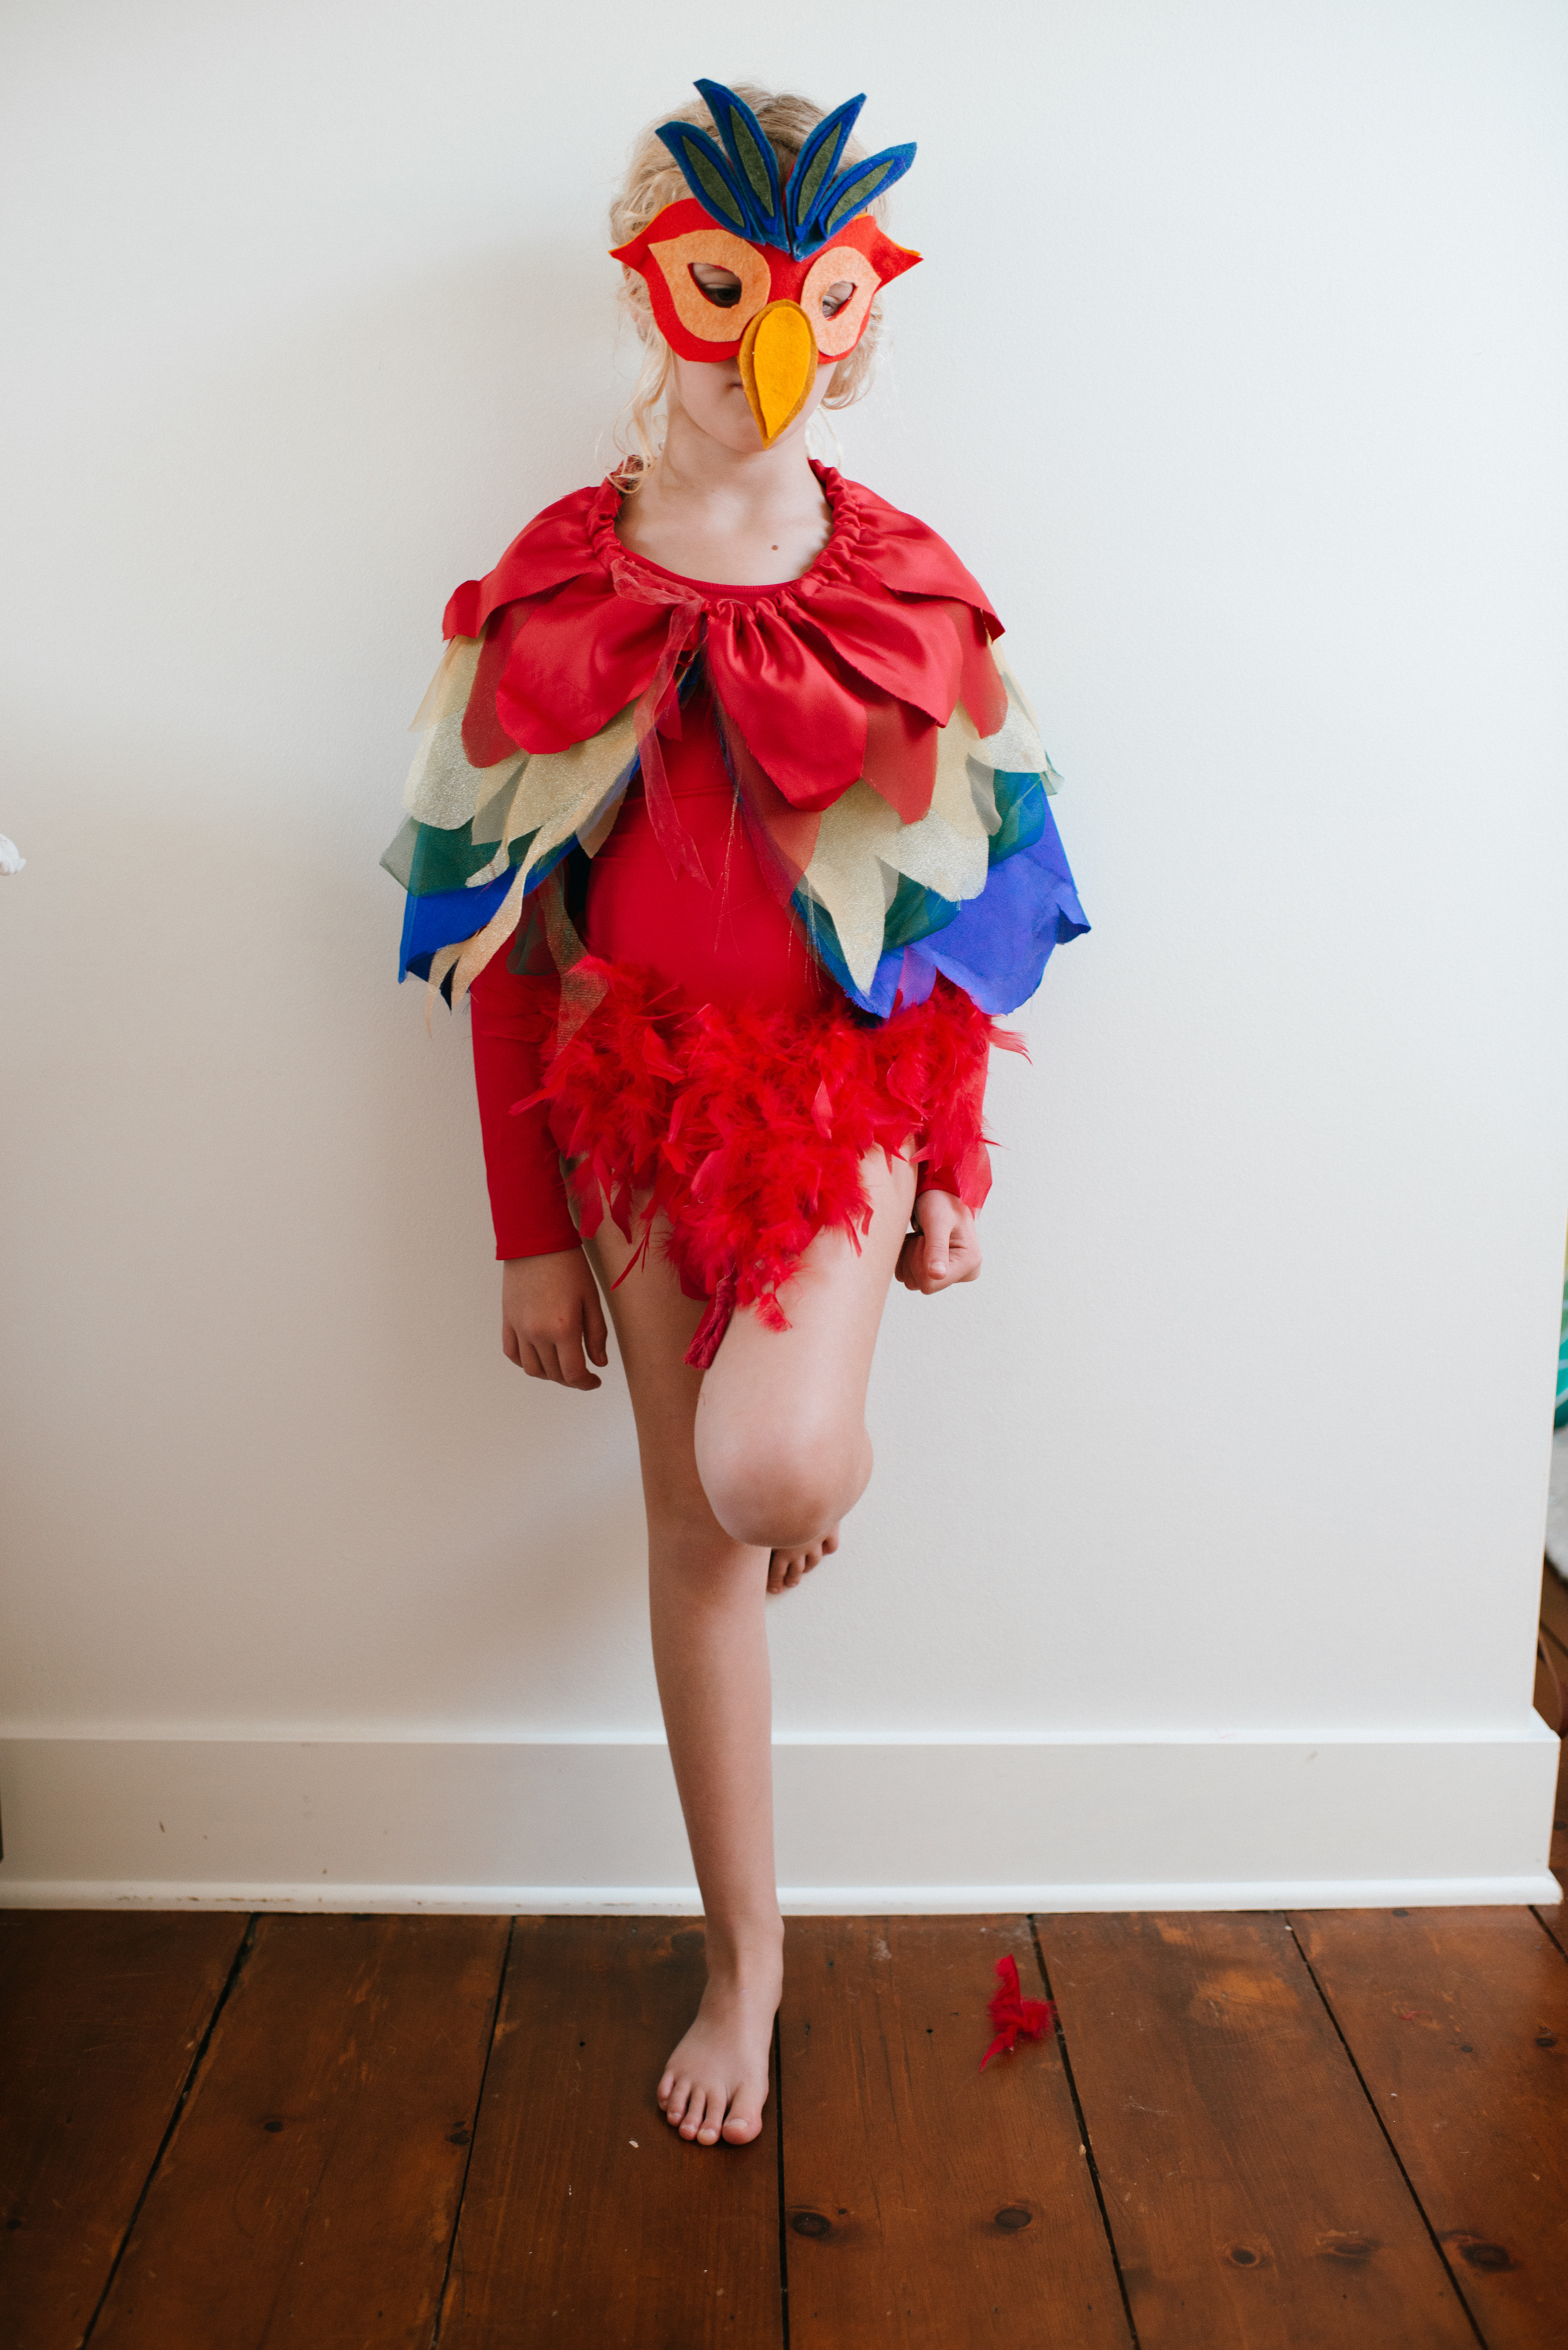
For the scarlett macaw mask I used the similar shape of the flamingo mask but I left out the details on the side and just made it plain. I added feathers from template three and used the eye outline from the peacock costume for the macaws eyes as well. As for the beak I went off the shape of the eyes in template three creating two different sizes for layering purposes. I found it adds character to layer 😉
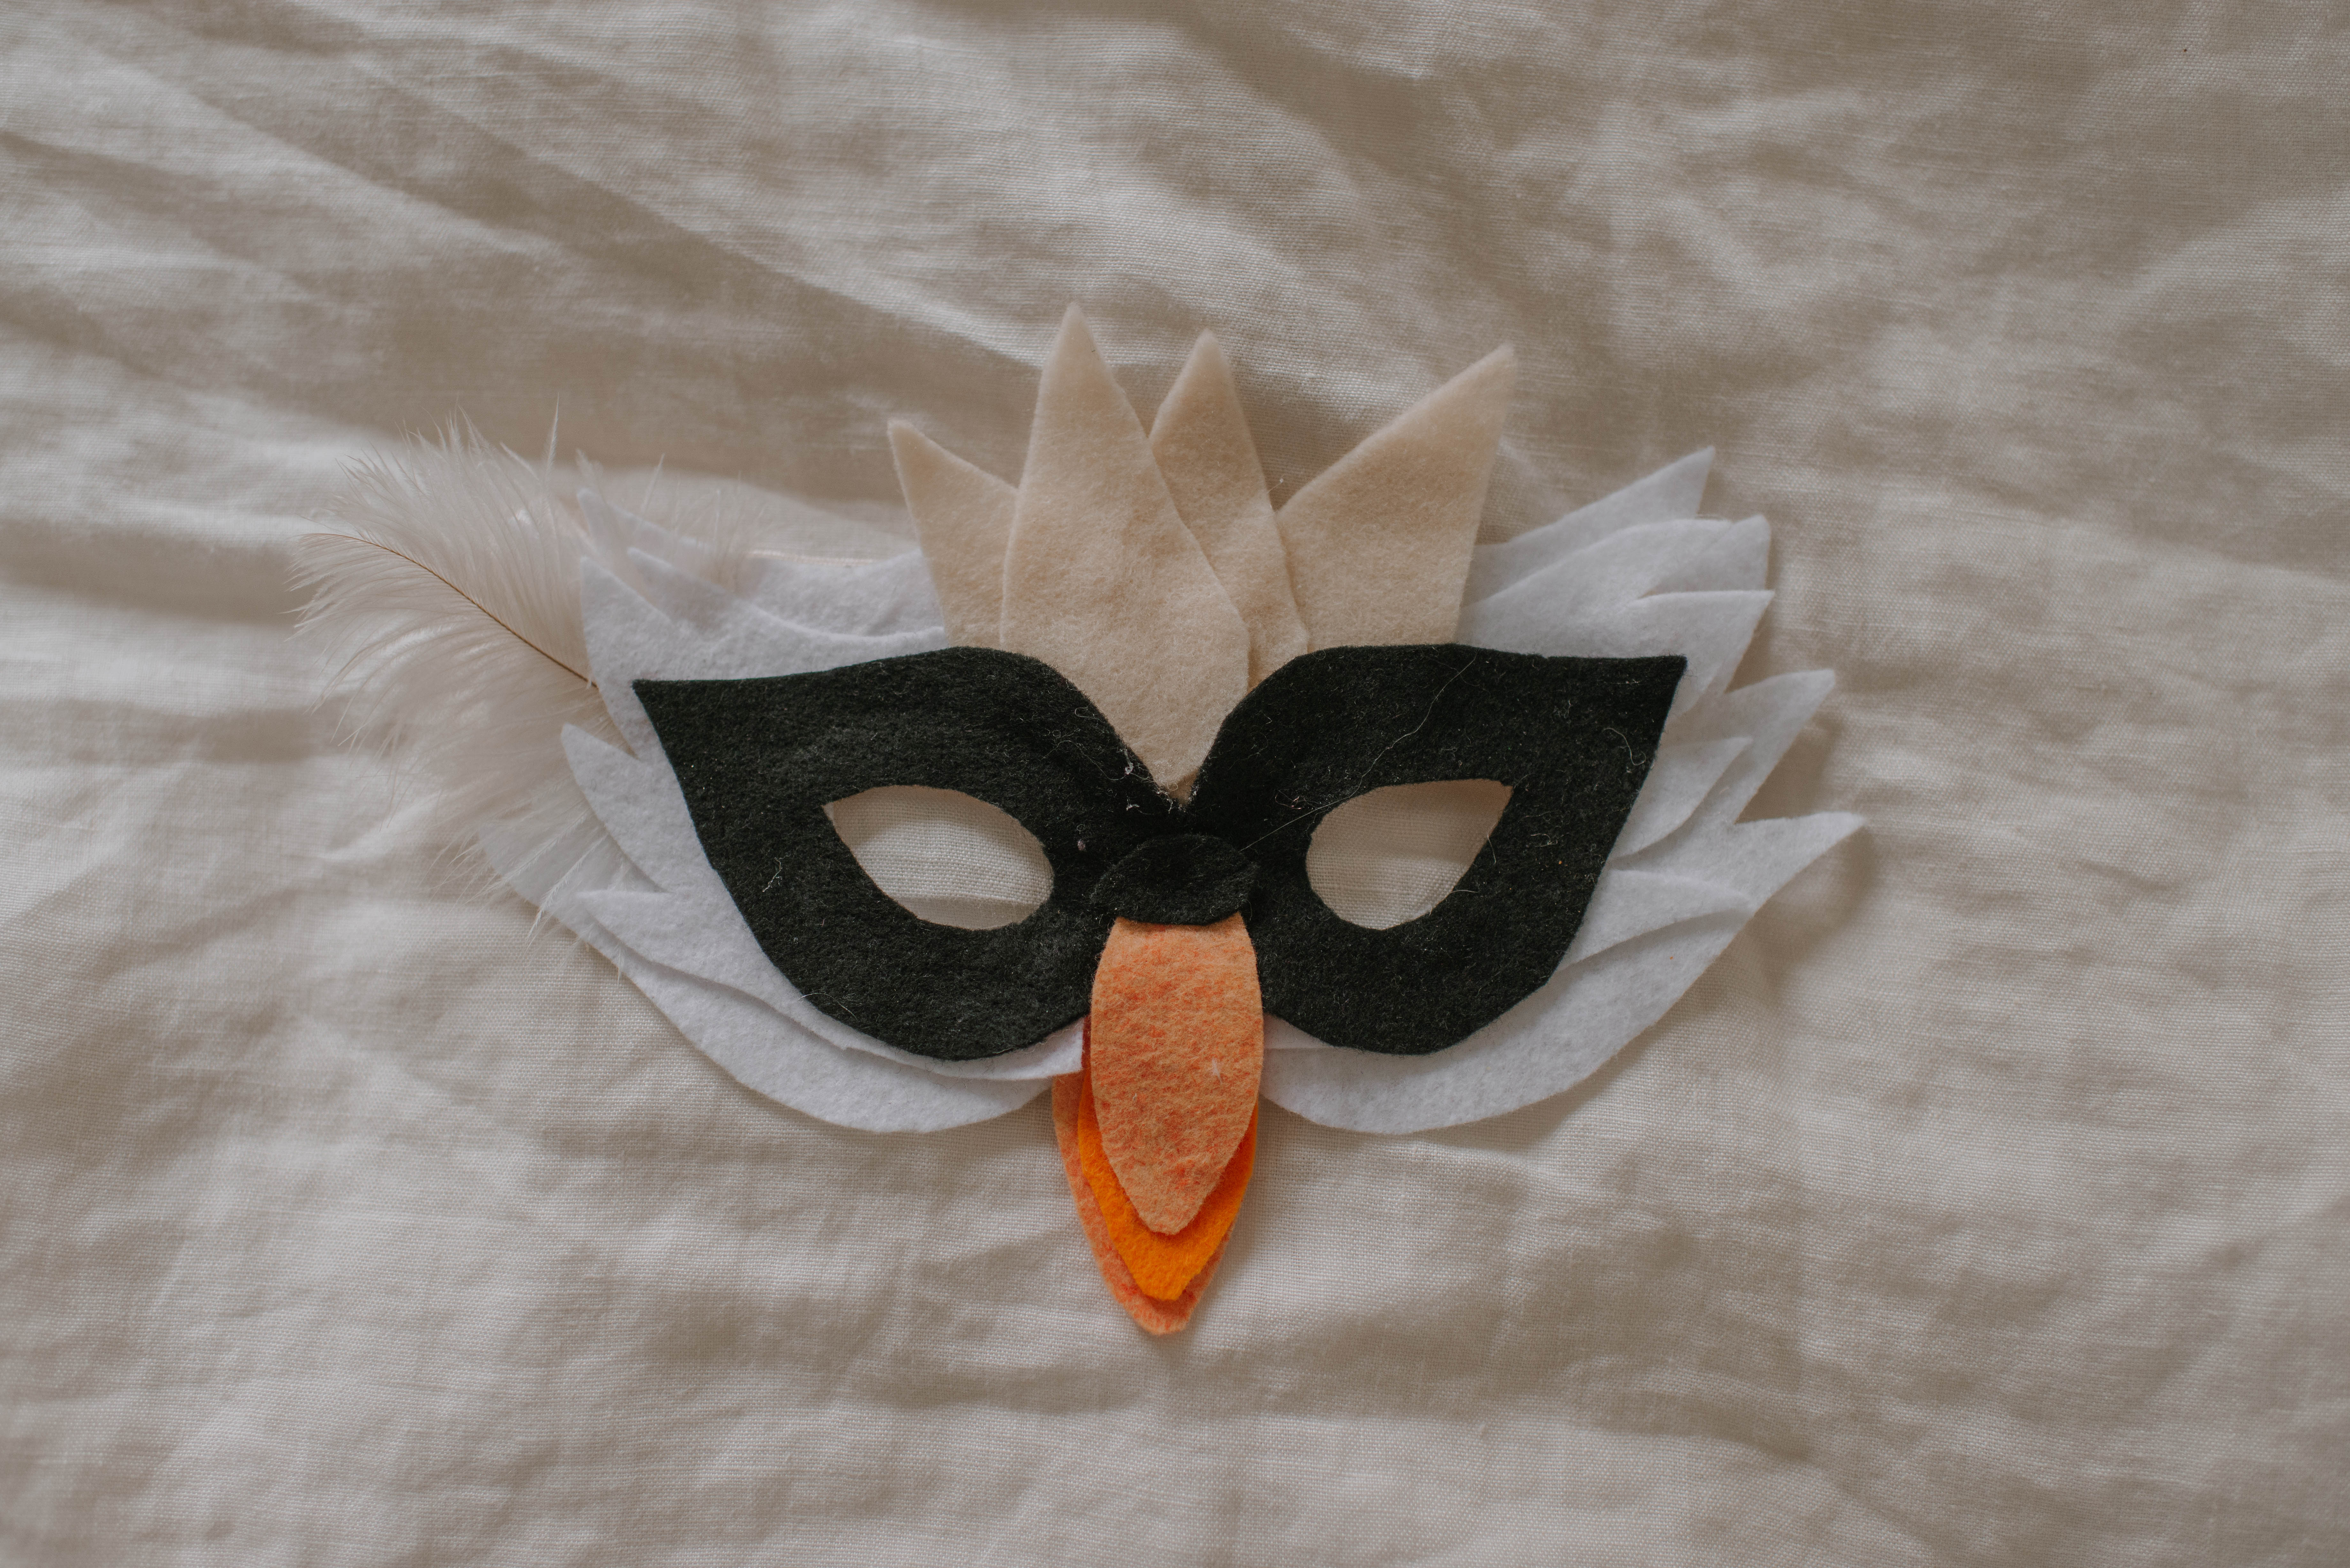
The white swan I used the peacock template but took out the feathers toward the bottom of the mask. For the feather details on the top of the mask head I used the peacock feathers in template one. For the black eyes I used the peacock template. As for the beak of the white swan I created my own. It’s basically a narrow oval shape that I layered with different sizes to add depth and character once again.
As you can see, they aren’t perfect by any means but that is what makes them unique and special 😉
Feel free to print the image of the mask to use as patterns for your own creation!
Okay, now onto the capes!
How to make the cape :
You will 1/2 yard for every fabric choice.
- 1/8 yard for your top layer (if you don’t know what you want for your top layer while shopping, error on the safe side and get 1/2 yd. It’s better to have too much fabric than not enough)
- Ribbon
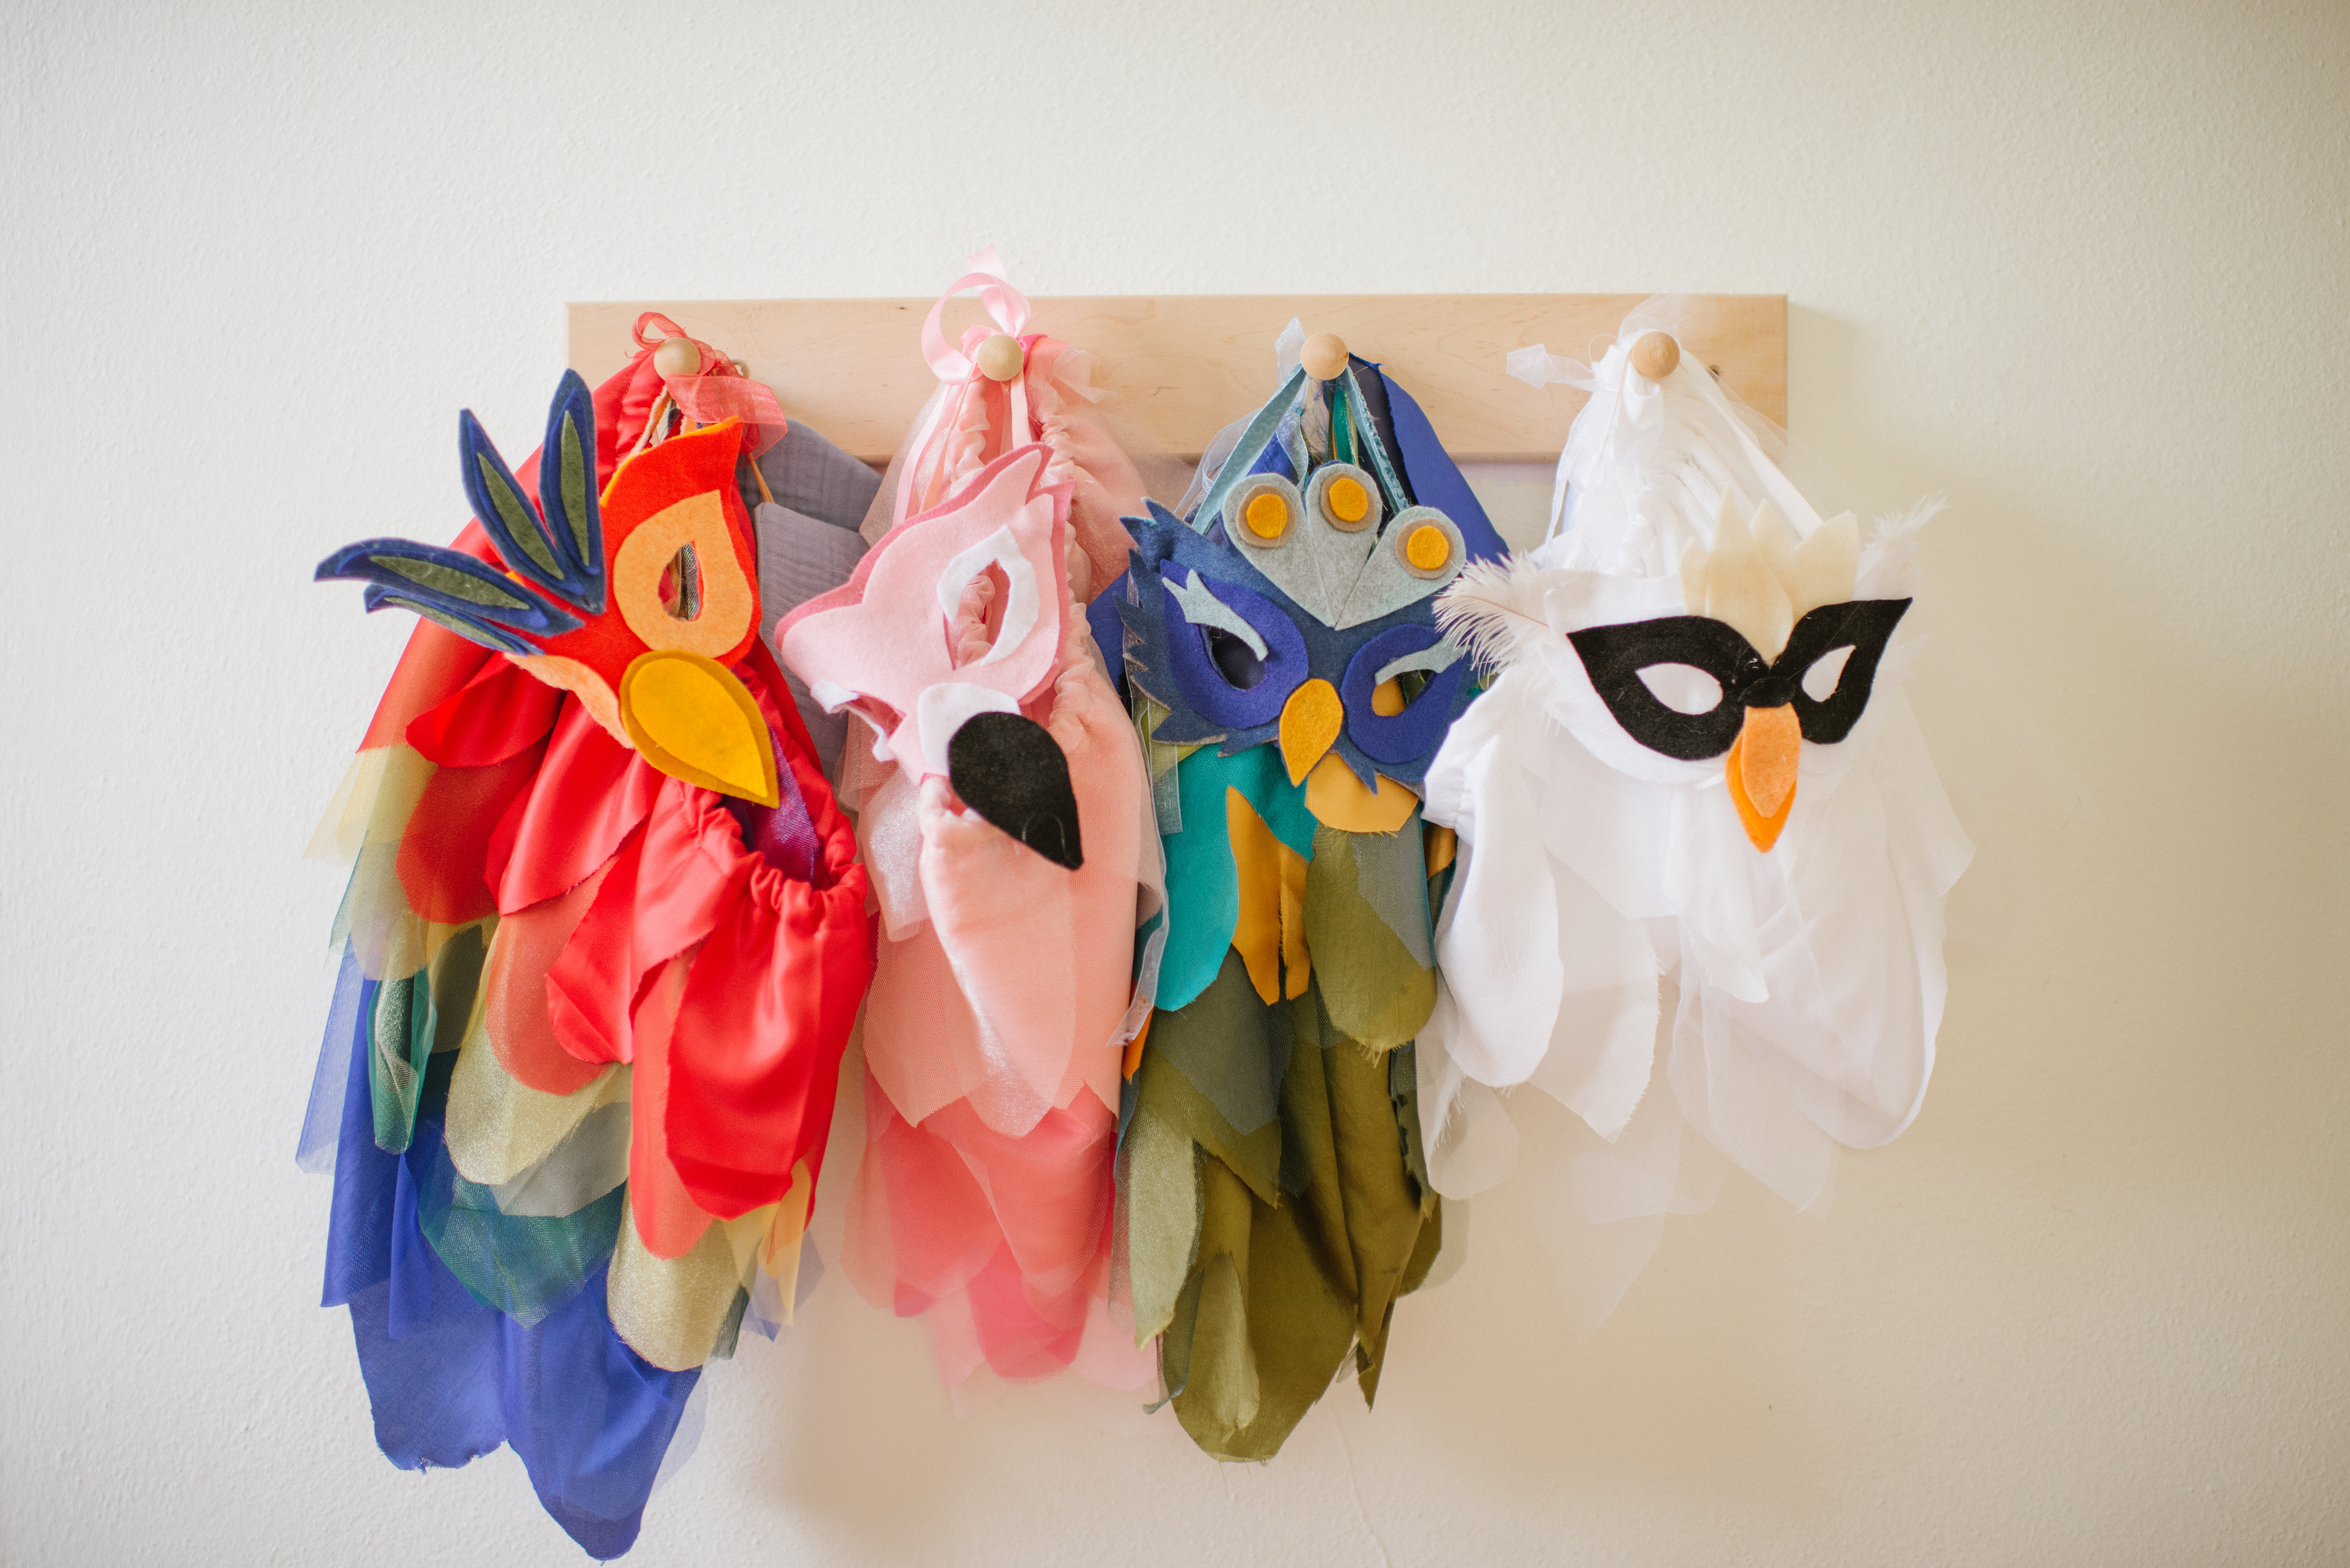
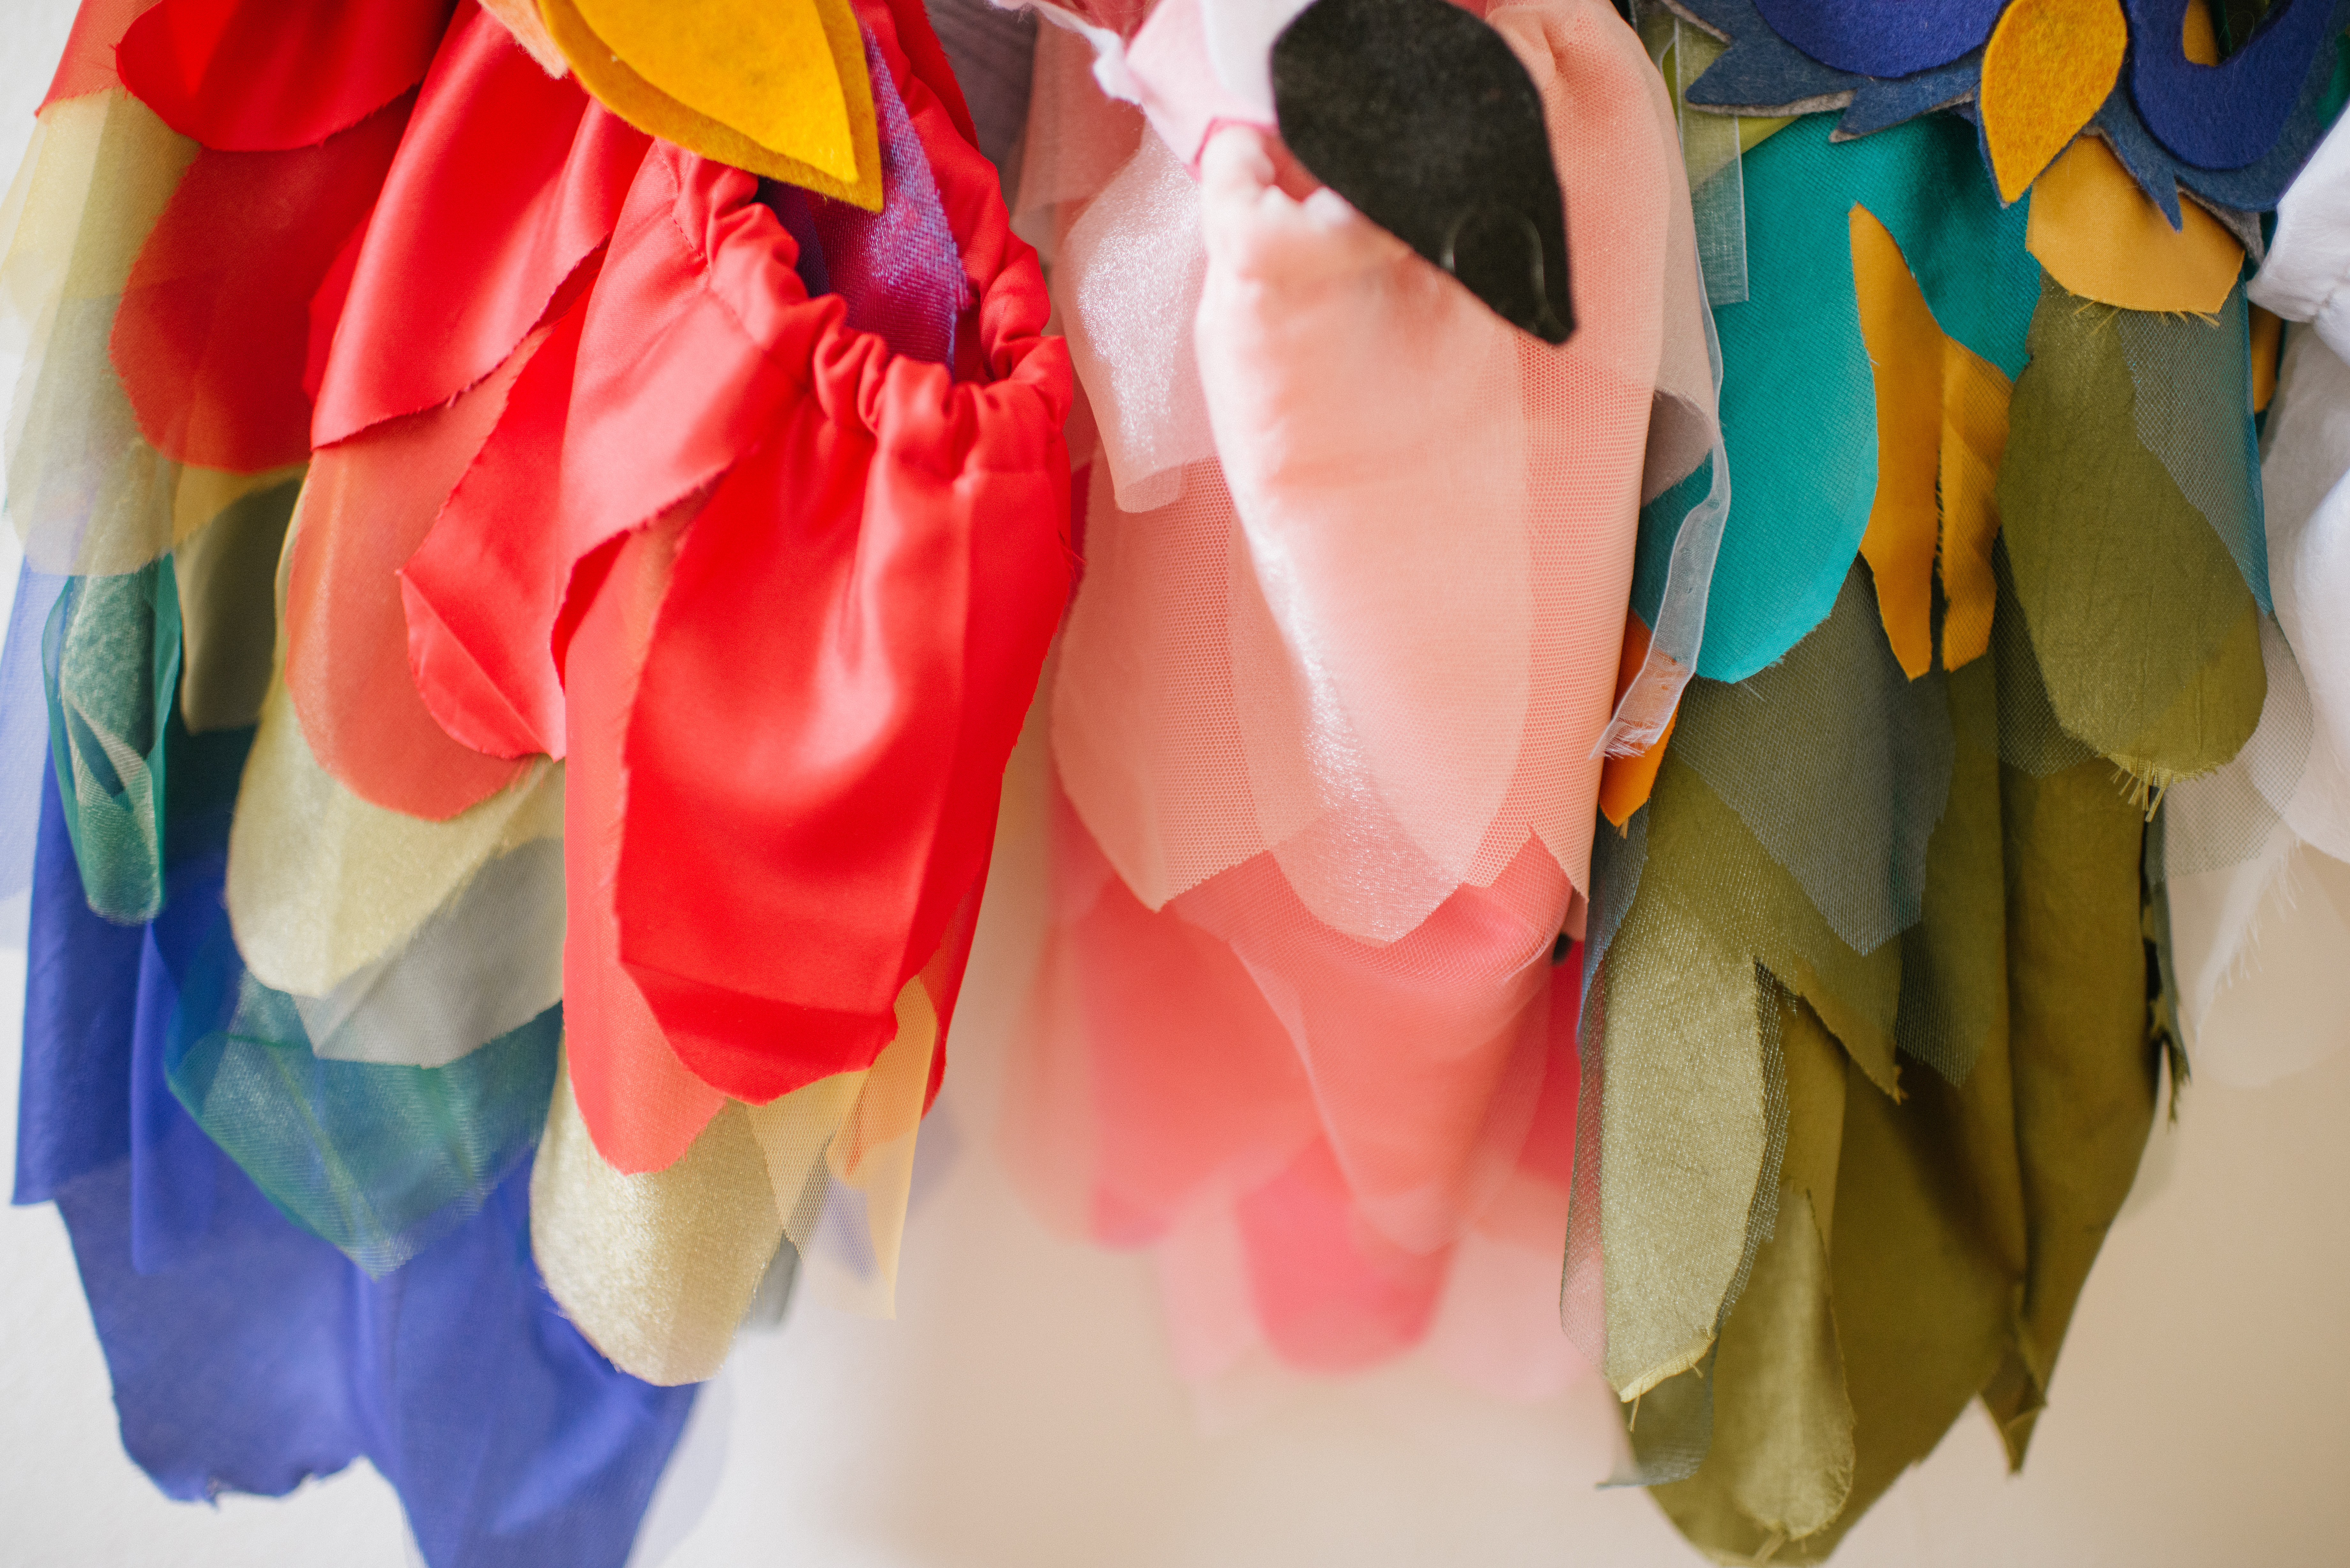
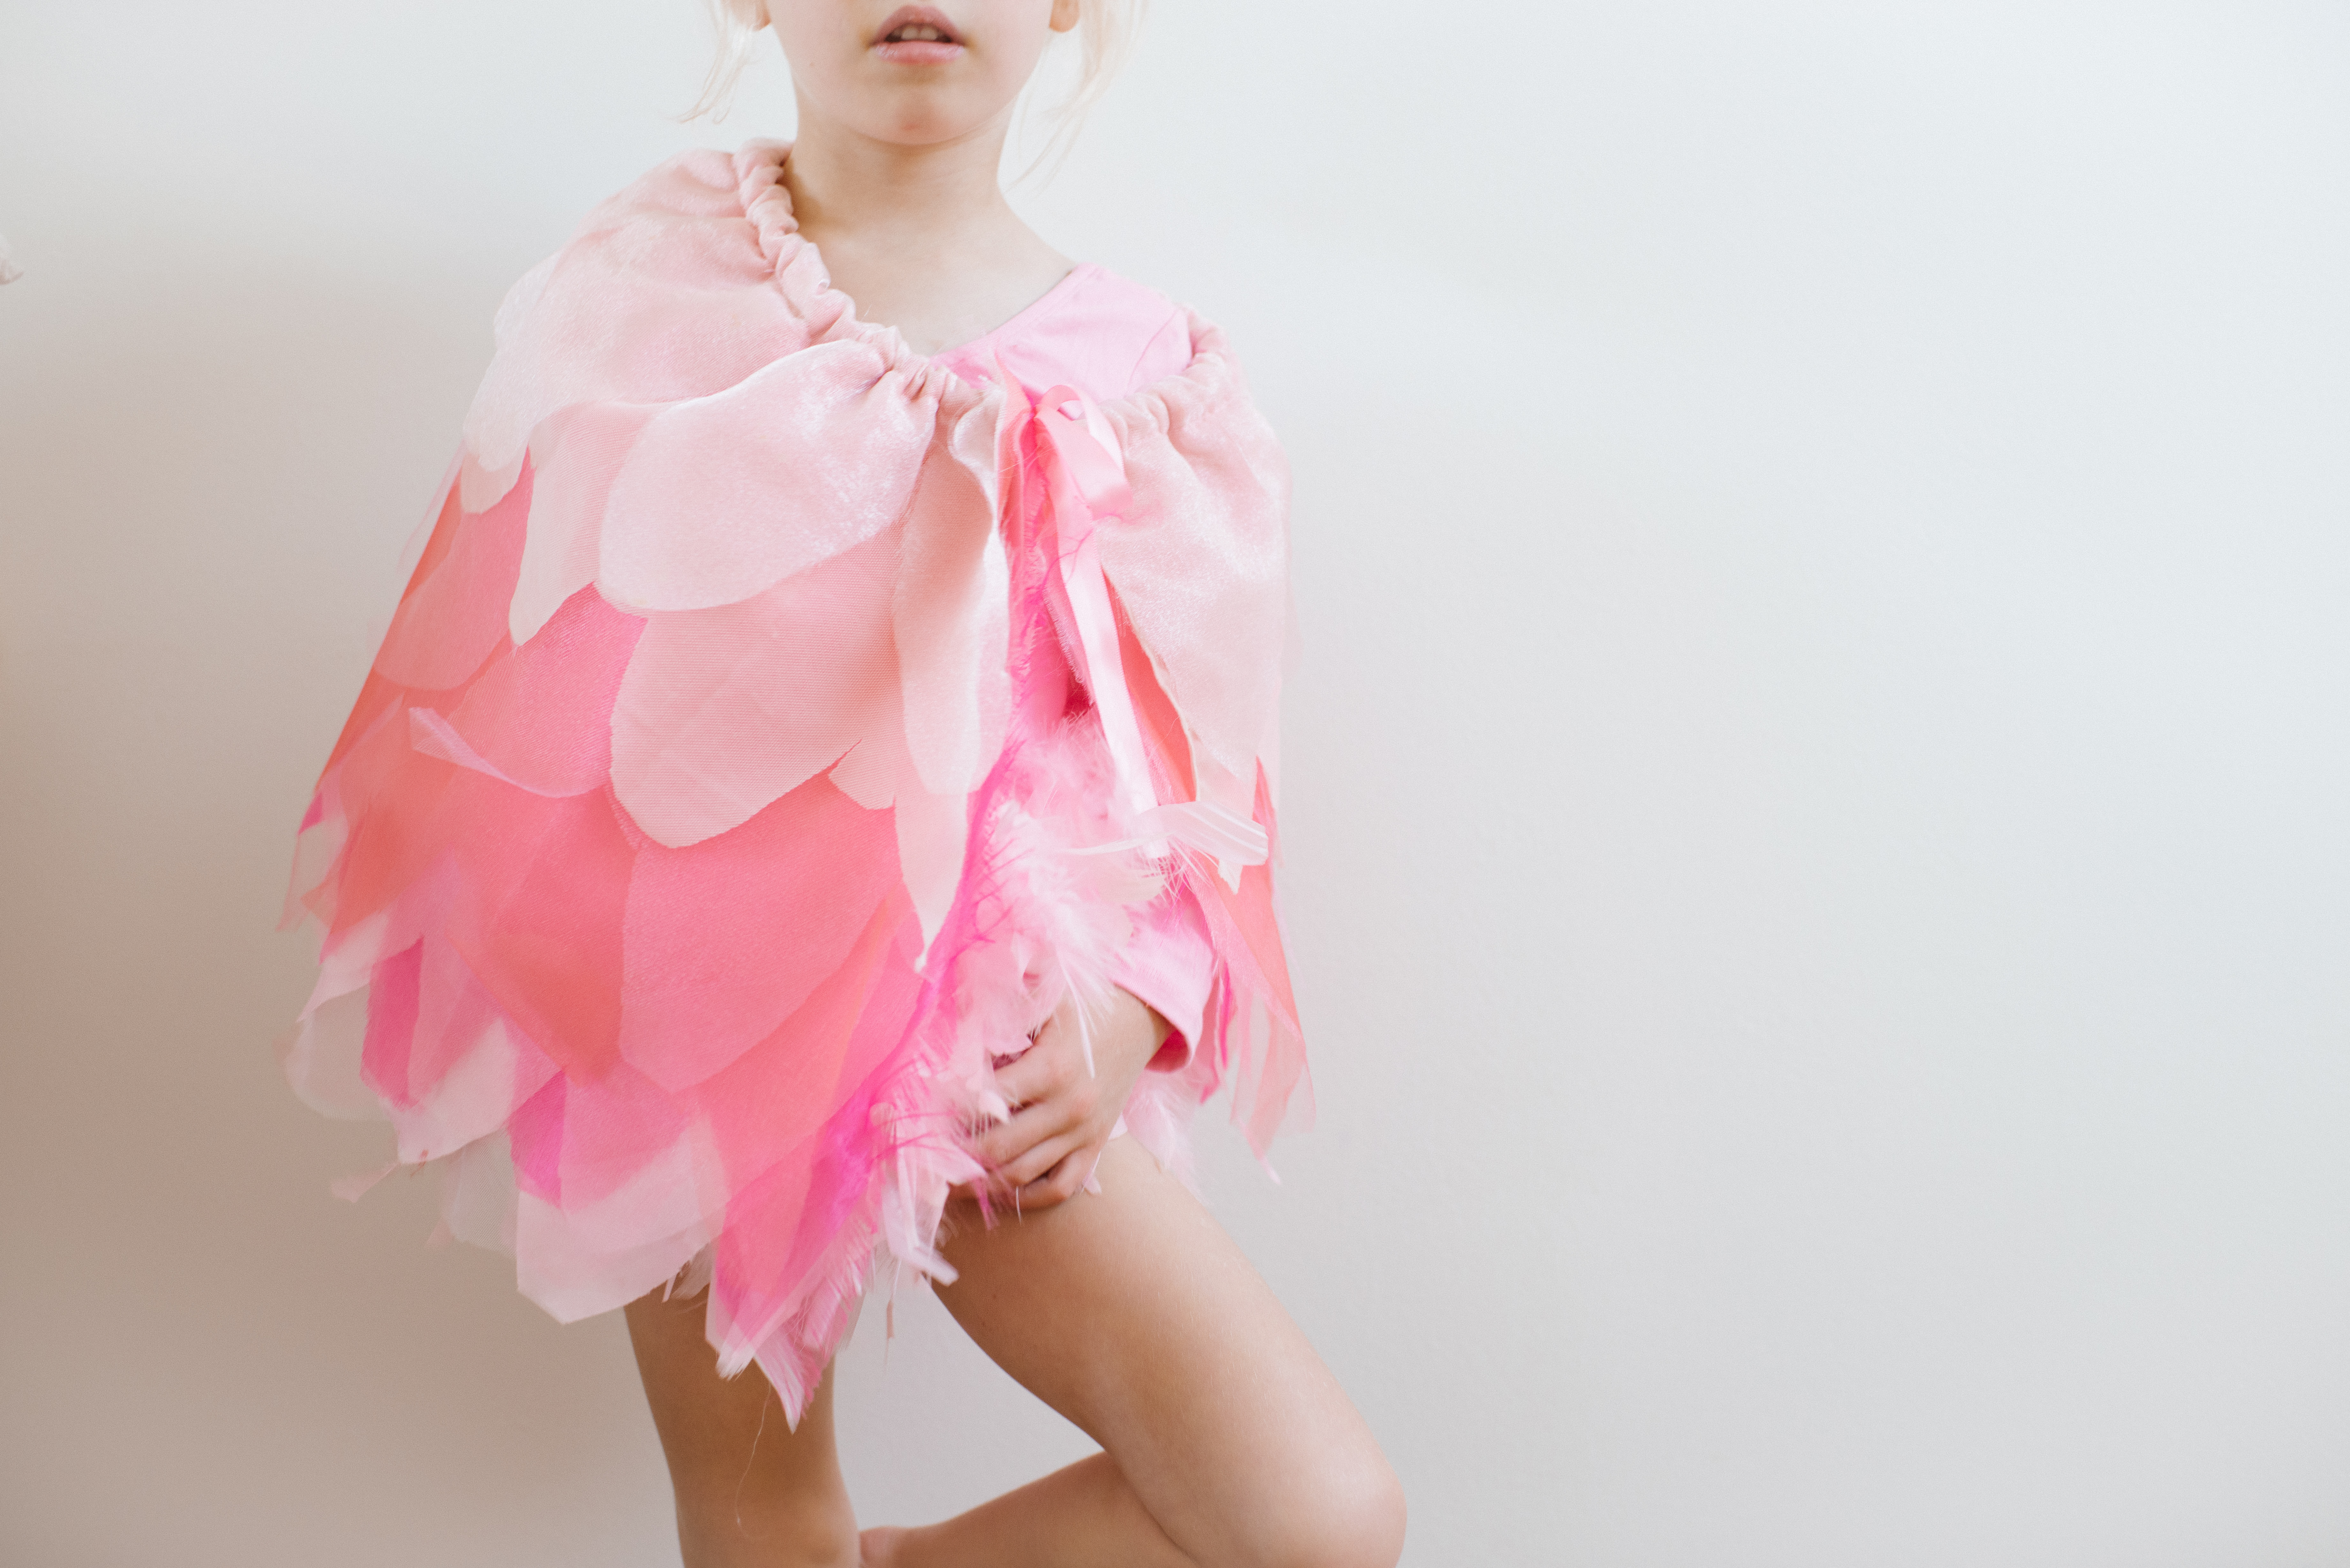
For the capes I purchased apparel fabric in a variety of polyester and tulle to match each bird costume. I used a variety of colors and shades to bring fullness and dimension to each cape. I used 5-6 colors/shades for each cape.
Once you have the fabric for the cape, simply stack each piece of fabric. Make sure you have the colors in the order you desire. Once you have them stacked and layered, fold the top down one inch and pin along the whole edge. You’re creating a seam for your ribbon to thread through. Now it’s time to sew! Sew along the edge that you pinned. After you’re done sewing, your colors should all be together.
Now take your ribbon and pin a safety pin to the end. Start threading your ribbon through the you just made. Once you have your ribbon through lay the fabric flat. DO NOT CUT the ribbon just yet. This will be your last step.
You should have your colors of fabric sewn together and your ribbon should be through on both sides.
Now it’s time to start cutting! I made a simple U-shape pattern to use for the feathers. I cut it out the pattern on stock paper in the size I desired (any size is good), leaving a flat top edge. Pin your pattern onto the fabric and start cutting your first layer. Note : you will be cutting a lot of fabric off the first couple layers but know it’s okay! Once you’re done with your first layer, alternate the spacing of where you put the feather on the second layer. Like shingles on a roof for example, they alternate. You don’t want to stack your feathers on top of one another. Repeat the steps until it’s complete! Don’t worry if you’re cut is choppy looking or not straight, as long as you alternate the feathers on each layer you should be good!
Once you have the fabric cut your ready to gather the cape and decide where you want to cut the ribbon. Cut the ribbon where you desire, making sure you’re leaving enough slack for it not to get lost in the seam and to be tied around the person your making it for.
And that is it!
This is would make a beautiful handmade gift for any little one in your life. My girls dress up often and these bird costumes have been their go to.
Enjoy crafting!